
Home composting turns kitchen scraps and yard waste into nutritious material for soil. This practical guide explains what you need, step-by-step setup, and simple troubleshooting so beginners can create a healthy compost system.
What Is Home Composting?
Home composting is the controlled decomposition of organic materials like food scraps and yard trimmings. The result is compost, a dark crumbly material that improves soil structure and plant health.
Composting reduces household waste, lowers landfill methane, and recycles nutrients back into your garden. There are many methods, from simple piles to worm bins and tumblers.
Why Start Home Composting
Composting is useful for gardeners and non-gardeners alike. It cuts waste, improves soil, and is inexpensive to start.
- Reduces food waste and trash volume.
- Provides nutrient-rich material for indoor plants or gardens.
- Supports soil life and water retention.
How to Start Home Composting
Starting home composting is straightforward. Follow these basic steps to set up a system that fits your space and lifestyle.
Step 1: Choose a Compost System
Pick a method that matches your space and available effort. Options include:
- Open pile: Works in yards but may attract pests if not managed.
- Compost bin or tumbler: Neater and easier to contain heat and pests.
- Worm composting (vermicompost): Ideal for small spaces and kitchens; produces fast, high-quality castings.
Step 2: Select Location and Container
Place a bin on bare soil or a hard surface with drainage. Choose a partly shaded site to maintain moisture and avoid drying out.
If using a tumbler, ensure you can rotate it easily. For worm bins, keep them indoors or in a sheltered outdoor spot where temperatures stay moderate.
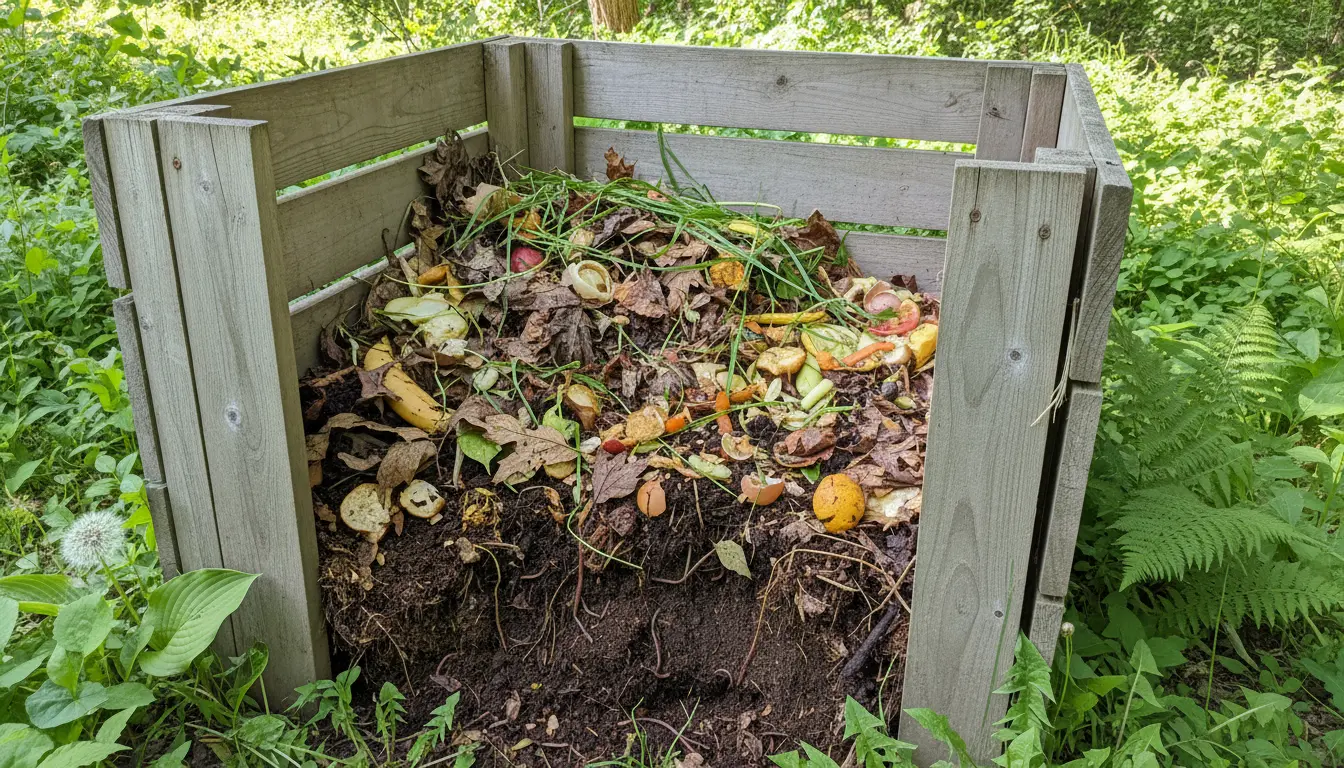
Step 3: Gather Materials and Balance
Compost needs a balance of carbon-rich “browns” and nitrogen-rich “greens.” Aim for roughly 3 parts browns to 1 part greens by volume.
- Greens: Fruit and vegetable scraps, coffee grounds, fresh grass clippings.
- Browns: Dry leaves, shredded paper, cardboard, straw.
Avoid meat, dairy, oily foods, and diseased plants in most home systems unless you have a hot composting setup.
Step 4: Build and Maintain the Pile
Start with a layer of coarse browns to allow airflow. Add mixed layers of greens and browns, keeping layers no more than a few inches thick.
Turn or aerate the pile every 1–2 weeks to supply oxygen for microbes. Maintain moisture like a damp sponge; add water if dry or more browns if soggy.
Troubleshooting Home Composting Problems
Common issues have simple fixes. Check these quick solutions before abandoning the pile.
Problem: Bad Odor
Smells indicate too much nitrogen or poor aeration. Fix by adding dry browns and turning the pile to introduce air.
Problem: Slow Decomposition
Slow breakdown can result from low moisture, large pieces, or insufficient nitrogen. Chop materials smaller, add greens, and keep the pile moist.
Problem: Pests or Rodents
Remove food scraps from the surface and bury them deeper in the pile. Use a closed bin with a secure lid or fine mesh if rodents are persistent.
Well-managed compost piles can reach internal temperatures of 130–160°F (55–70°C), which helps kill weed seeds and most plant pathogens.
Tips for Successful Home Composting
- Chop or shred larger materials to speed decomposition.
- Keep a small countertop bin for kitchen scraps to encourage consistent collection.
- Layer greens and browns rather than adding one type continuously.
- Monitor moisture and aerate regularly.
- Use finished compost as a soil amendment, mulch, or potting mix ingredient.
Small Real-World Example
Case study: A three-person household in a small yard started a 55-gallon tumbler for home composting. They collected kitchen scraps in a covered counter bucket and added dry leaves from the yard.
Within six months they produced about 30 liters of compost, which they mixed into potted vegetables and flower beds. Their weekly trash bin weight dropped by roughly 35%, and plants showed improved vigor with fewer waterings needed.
When to Use Finished Compost
Compost is ready when it looks dark, crumbly, and smells earthy. It should no longer be recognizable as the original material.
Use finished compost to topdress lawns, mix into garden beds, or as an ingredient in potting mixes. Avoid using unfinished compost directly around seedlings.
Final Checklist for Home Composting
- Choose the right system for your space (bin, tumbler, or worm bin).
- Balance greens and browns and keep material shredded where possible.
- Maintain moisture and aeration for active decomposition.
- Monitor for odors, pests, and temperature to adjust management.
- Harvest finished compost and apply it to soil to close the nutrient loop.
Starting home composting is a low-cost, practical way to reduce waste and improve soil health. With basic attention to balance, moisture, and aeration, beginners can produce valuable compost for gardens and houseplants.