
Home composting is a simple way to turn kitchen scraps and yard waste into nutrient rich material for gardens. This guide explains step by step how to start, manage, and troubleshoot a home compost system.
What Is Home Composting
Home composting is the biological decomposition of organic materials in a controlled space at your home. Microbes, insects, and worms break down items into humus that improves soil structure and fertility.
Benefits of Home Composting
Composting reduces household waste sent to landfill and lowers methane emissions from organic waste. It also returns nutrients to the soil and can reduce the need for chemical fertilizers.
Other benefits include improved soil moisture retention and better plant health. Compost can be used in pots, garden beds, lawns, and around trees.
How to Start Home Composting
Starting a compost system requires selecting a method, collecting materials, and maintaining balance. You can begin with a simple bin or a managed pile depending on space and goals.
Choosing a Home Composting Method
Select a method that fits your available space and time. Common options include a backyard compost bin, a tumbling composter, vermicomposting with worms, or a simple heap.
Tumblers speed up decomposition and reduce turning effort, while vermicomposters work well indoors or on a balcony. Backyard bins are low cost and suitable for larger volumes of yard waste.
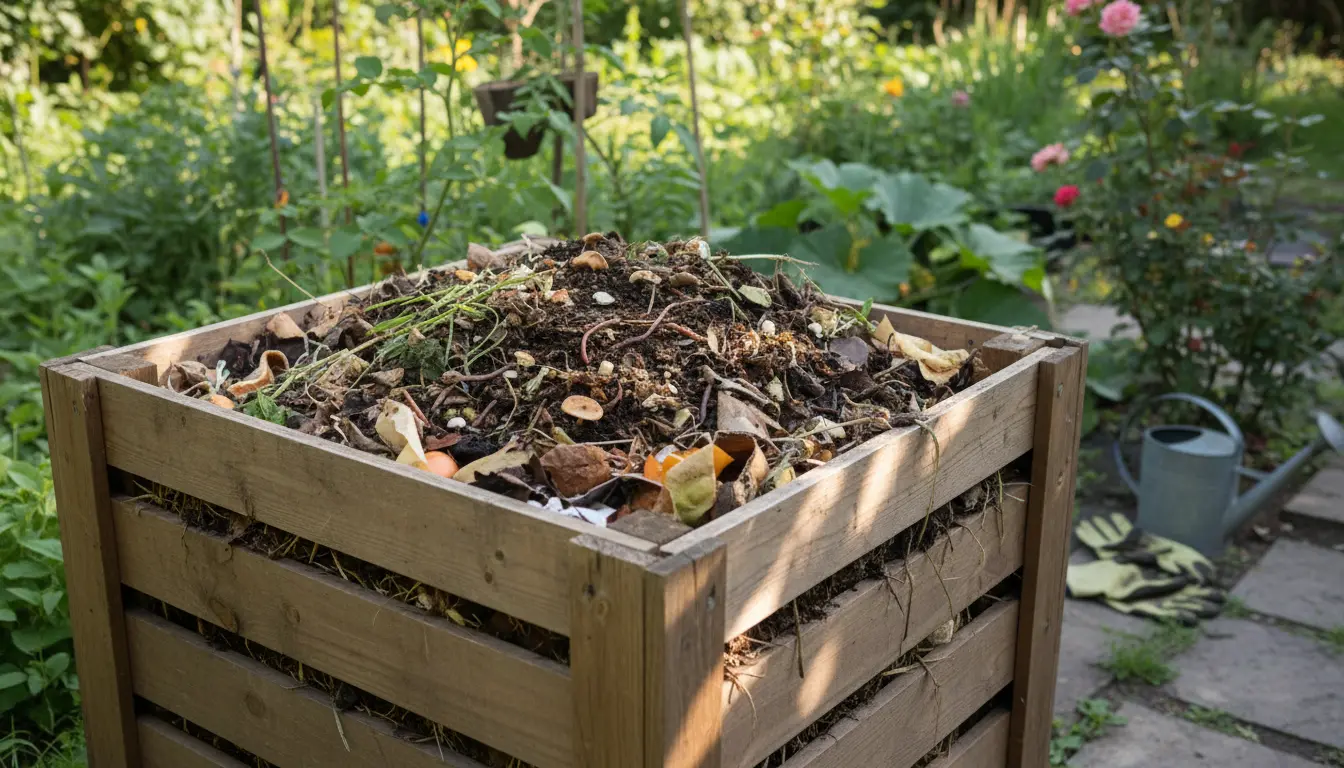
Location and Bin Setup for Home Composting
Place your compost bin on soil or level ground to allow organisms to move in and drainage to occur. Choose a spot with partial shade to avoid extremes of heat and cold.
Ensure the bin has some ventilation and a lid or cover to keep pests out and moisture balanced. If space is limited, use a compact tumbler or indoor worm bin.
What to Add and What to Avoid
Balance carbon rich materials with nitrogen rich materials to create an active compost mix. Aim for a ratio close to 25 30 parts carbon to 1 part nitrogen by weight for an aerobic pile.
- Good greens (nitrogen): fruit scraps, vegetable peels, fresh grass clippings, coffee grounds
- Good browns (carbon): dry leaves, straw, shredded cardboard, paper
- Do not add: meat, dairy, oily foods, diseased plants, pet waste
Turning, Aeration, and Moisture
Turn or mix the pile every 1 to 2 weeks to add oxygen and speed decomposition. A well aerated pile decomposes faster and reduces odors.
Moisture should feel like a wrung out sponge. Add water if the pile is dry and add dry browns if it becomes soggy.
Troubleshooting Common Issues in Home Composting
If your compost smells bad it is usually too wet or has too many nitrogen rich materials. Turn the pile and add dry browns like leaves or shredded cardboard to rebalance it.
Slow decomposition often means the pile is too small, too dry, or lacks nitrogen. Increase size by grouping materials, add water and some greens, and turn regularly to revive activity.
Adding crushed eggshells can supply calcium to compost and help balance pH. Rinsed eggshells break down faster when crushed.
Small Real World Example Case Study
Case study John and Maya live in a suburban home with a small vegetable garden and a lawn. They started a 3 bin system to manage kitchen scraps and yard waste.
They placed one bin in partial shade and added alternating layers of greens and browns. After two months of regular turning and occasional moisture checks they produced dark crumbly compost suitable for their raised beds.
The couple reduced their weekly trash by one bag and noticed improved soil structure in their tomato beds. Their initial startup cost was under 100 dollars and they now reuse compost annually to top dress plants.
Maintenance Schedule and Practical Tips for Home Composting
Follow a simple routine to keep a healthy compost system and avoid common problems. Schedule collections, turning, and checks to ensure steady progress.
- Daily: Add kitchen scraps to a covered container or freezer bag and transfer to the bin weekly
- Weekly: Turn the pile and check moisture levels
- Monthly: Add bulky browns and inspect for pests or anaerobic odors
- Every 2 6 months: Harvest finished compost from the bottom of the bin for use
Tools that help include a pitchfork or compost aerator, a garden thermometer for large piles, and a wire screen for sifting finished compost. Label bins or sections to track active and curing material.
Final Steps and Using Home Compost
Finished compost is dark, crumbly, and smells earthy. Use it as a soil amendment by mixing into beds, topping potted plants, or making compost tea for liquid feeding.
Home composting is adaptable to apartments, townhouses, and large properties with scalable methods. Start small, learn by doing, and adjust materials and methods to your situation.
Ready to begin the first pile Keep a small kitchen caddy for scraps and pick a bin today to turn your waste into a garden resource.