
Why Choose Home Composting
Home composting turns kitchen and yard waste into a useful soil amendment. It reduces household trash, lowers methane emissions, and gives you free compost for plants.
For beginners, composting is a straightforward process when you follow simple rules for materials and maintenance. This guide walks you through safe, effective steps.
Basic Principles of Home Composting
Composting relies on microbes breaking down organic matter. Success depends on the right mix of carbon and nitrogen, moisture, air, and time.
Keep these principles in mind as you build and manage your compost pile or bin.
Carbon to Nitrogen Ratio
Balance “browns” (carbon) with “greens” (nitrogen). Browns are dry materials such as leaves and shredded paper. Greens are fresh scraps like vegetable peelings and grass clippings.
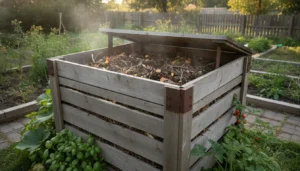
A good rule of thumb is roughly 3 parts browns to 1 part greens by volume. Adjust based on smell and texture.
Moisture and Aeration
Compost should feel like a wrung-out sponge: damp but not dripping. Too wet compost smells sour; too dry activity slows down.
Turn or aerate your pile every 1–2 weeks to keep oxygen available for microbes. Small bins may need less turning if properly designed.
Choosing a Compost System for Home Composting
Select a system that fits your space and lifestyle. Options range from simple piles to enclosed tumblers and countertop bokashi kits.
Consider smell control, ease of turning, and how quickly you want finished compost.
Common Options
- Open pile: Cheapest, works well in yards but needs space and regular turning.
- Stationary bin: Neat and contained; good for steady, low-maintenance composting.
- Tumbler: Easy to turn and fast when loaded correctly; ideal for small yards.
- Bokashi: Fermentation system for kitchens; handles meat and dairy but requires a soil burial or second-stage composting.
What to Compost and What to Avoid
Knowing what to add keeps your compost healthy and pest-free. Most plant-based kitchen scraps are fine, but some items cause problems.
Good Materials
- Vegetable and fruit scraps
- Coffee grounds and filters
- Tea bags (remove staples)
- Eggshells (crushed)
- Yard waste: leaves, grass clippings, small twigs
- Shredded paper and cardboard (non-glossy)
Materials to Avoid
- Meat, fish, bones, and greasy foods (unless using bokashi)
- Dairy products and oils
- Diseased plants or plants treated with persistent pesticides
- Pet waste from carnivores (dogs, cats)
Step-by-Step Home Composting Process
Follow these practical steps to start composting at home. Keep actions simple and repeatable.
1. Pick a Site and Container
Choose a level, well-drained spot with some shade. A bin or tumbler keeps things tidy and deters pests.
2. Build Your First Layer
Start with coarse browns like twigs to help airflow. Then add a mix of greens and browns in alternating layers.
3. Maintain Balance and Moisture
Adjust browns and greens as needed. If it smells, add more browns and turn the pile. If activity slows, add greens or water.
4. Turn and Monitor
Turn the compost every 1–2 weeks to introduce oxygen. Monitor temperature and moisture; a warm center indicates active breakdown.
5. Harvest Finished Compost
Compost is ready when it is dark, crumbly, and smells earthy. This can take 2 months to a year depending on system and management.
Troubleshooting Common Issues in Home Composting
Problems like bad smells, pests, or slow decomposition are common but fixable. Diagnose the cause and apply simple fixes.
- Smelly or slimy compost: Add dry browns, turn to aerate, and reduce wet materials.
- Pests or rodents: Avoid adding meat or dairy; use a closed bin and bury food scraps within the pile.
- Pile not heating: Add more greens and mix; consider increasing pile size for better insulation.
Home composting can divert up to 30 percent of household waste from landfills. Even small apartment systems capture food waste that would otherwise produce methane in a landfill.
Small Real World Case Study
Emma, a renter in a city apartment, started a countertop bokashi bin and a small outdoor stationary bin. She collected average kitchen scraps for 6 months.
Results: Emma produced about 120 liters of pre-compost via bokashi and mixed it into an outdoor bin. After 4 months of managing moisture and turning, she harvested 25 liters of finished compost for potted plants and balcony garden vegetables.
The system cut her weekly trash by roughly one bag and improved plant growth noticeably.
Using Finished Compost
Apply finished compost as a top dressing, mix into potting soil, or blend into garden beds. It improves soil structure, moisture retention, and nutrient supply.
Start with 1–3 cm of compost on beds or mix 10–20 percent compost into potting mixes for container plants.
Summary Tips for Successful Home Composting
- Balance browns and greens; aim for about 3:1 by volume.
- Keep compost moist but not waterlogged.
- Turn regularly to provide oxygen and speed breakdown.
- Choose a bin that fits your space and commitment level.
- Start small and scale up as you learn what works for your site.
With a simple system and regular attention, home composting becomes a low-effort routine that saves waste and benefits plants. Begin with modest goals and adapt your approach as you gain experience.