
Why Home Composting Matters
Home composting turns kitchen and yard waste into valuable soil amendment. It reduces landfill trash, lowers methane emissions, and improves garden soil health.
Composting is practical for apartments with small bins and for homeowners with backyard systems. This guide explains simple steps and choices to get started and stay successful.
How Home Composting Works
Composting is a controlled decomposition process by microbes and invertebrates. The key is balancing carbon rich (brown) and nitrogen rich (green) materials, moisture, and airflow.
When conditions are right, compost heats up, breaks down organic matter, and produces crumbly, earthy-smelling finished compost you can use in pots or garden beds.
Essential Elements for Home Composting
- Brown materials: dry leaves, shredded paper, cardboard, straw.
- Green materials: vegetable scraps, coffee grounds, fresh grass clippings.
- Air: oxygen is needed for aerobic microbes.
- Moisture: about like a wrung-out sponge, not soaking wet.
- Time: from 2 months to a year depending on method and materials.
Getting Started with Home Composting
Choose a method that matches your space, time, and effort level. Basic options include a simple pile, a bin, or a tumbler. Each has pros and cons.
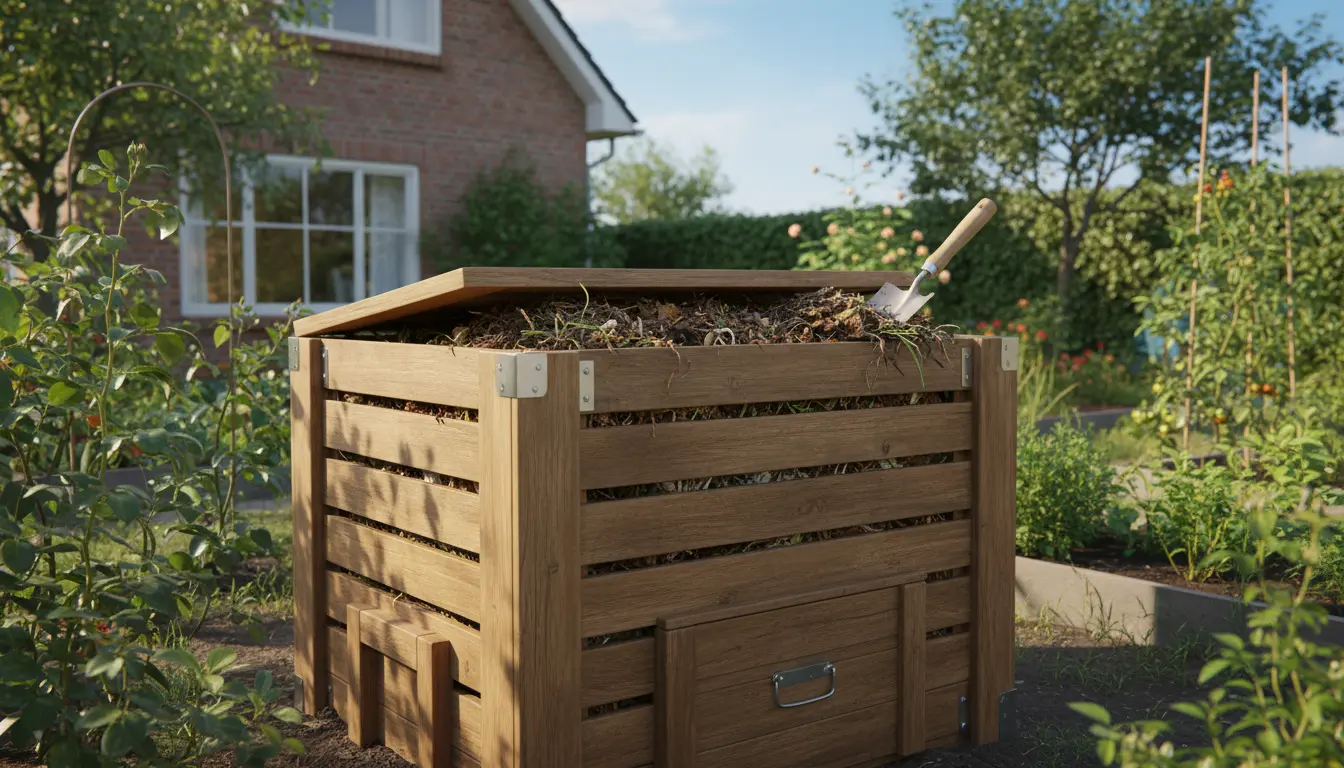
Choosing a Bin for Home Composting
Bins keep material contained and look tidier. For small yards, a 200–400 liter closed bin works well. Tumblers speed mixing and reduce pests, while open bins are cheap and easy to build.
For apartment gardeners, use a small worm bin (vermicomposting) that fits under a sink or on a balcony.
Step-by-Step Home Composting Process
Follow these simple steps to start composting at home. Use short cycles at first to learn how materials behave.
- Pick a dry, shady spot near a water source for outdoor bins.
- Start with a base layer of coarse browns like twigs to help airflow.
- Add alternating layers of green and brown materials in 5–10 cm layers.
- Keep the pile moist, roughly the consistency of a wrung-out sponge.
- Turn or mix the pile every 2–4 weeks to add oxygen and speed breakdown.
- Harvest finished compost when it is dark, crumbly, and smells earthy.
What Not to Put in Home Composting Bins
- Meat, bones, dairy, and oily foods unless using a hot or enclosed system.
- Diseased plant material or invasive weeds if you cannot get consistent high heat.
- Pet feces from meat-eating animals.
- Large logs or thick branches that take too long to break down.
Composting can reduce household waste volume by up to 30 percent and return nutrients to soil, lowering the need for synthetic fertilizers.
Troubleshooting Home Composting
Common problems are usually easy to fix with small adjustments. Smells often indicate too much green material or poor airflow.
Smelly Pile
If your compost smells sour or rotten, add more brown materials and turn the pile to introduce air. Avoid adding more food scraps until balance is restored.
Pile Too Dry or Too Wet
Dry piles slow down decomposition. Add water and green materials to restore moisture. If the pile is waterlogged, mix in dry browns and improve drainage or cover the bin.
Slow Breakdown
Slow composting can result from large pieces, low temperatures, or an imbalance of brown and green. Chop or shred large items and adjust the green/brown ratio to about 1 part green to 3 parts brown by volume.
Using Finished Compost
Finished compost improves soil structure, water retention, and nutrient content. Use it as a top dressing, work it into potting mixes, or blend with garden soil at a rate of 10–30%.
Always check that compost is fully decomposed before using on seedlings or sensitive plants.
Small Real-World Case Study
Emily, an urban homeowner, started a 300-liter bin in her backyard. She saved kitchen scraps in a countertop caddy and added shredded paper from mail and dry leaves each week.
Within five months, turning the bin every two weeks, she produced about 80 liters of finished compost. Her tomatoes produced larger fruit and needed less fertilizer the following season.
Practical Tips and Examples
- Kitchen caddy ideas: use newspaper-lined containers to reduce odor and flies.
- Shredders: a simple paper shredder or pruning shears speed decomposition.
- Worm bins: for apartments, 5–20 liters can handle most kitchen scraps for one person.
Start Simple and Improve Over Time
Begin with small, manageable steps: choose a bin, collect scraps, and aim for the right balance of brown and green. Observe and tweak the system as needed.
With routine attention and simple fixes, home composting becomes an efficient way to cut waste and build healthier soil for your plants.