

Home Composting for Beginners: Getting Started
Composting at home turns kitchen scraps and yard waste into nutrient-rich soil. This guide gives clear, step-by-step instructions for beginners to set up a low-maintenance system.
Follow these instructions regardless of space or experience. You can compost on a balcony, in a small backyard, or with a worm bin indoors.
Why home composting matters
Composting reduces landfill waste and returns organic matter to soil. It improves plant growth and cuts the need for chemical fertilizers.
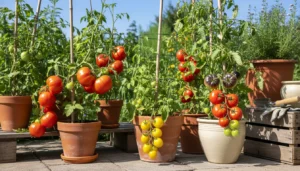
For many households, a simple compost routine saves money and supports a healthier garden or potted plants.
Choose a Compost System for Your Home
Select a system based on space, time, and odor tolerance. The most common options are backyard bins, tumblers, and worm (vermicompost) bins.
- Backyard bin: Good for yards; low cost but requires turning.
- Tumbler: Easier to turn and faster results; higher cost.
- Vermicompost (worm bin): Ideal for small spaces and kitchens; works indoors with minimal odor.
Basic tools and setup
You need a bin, a pitchfork or turning tool, and a small thermometer if you want to monitor heat. Place the bin on soil or a breathable surface to allow drainage and beneficial organisms to enter.
Materials and Ratios for Home Composting
Compost works when you balance carbon-rich and nitrogen-rich materials. This balance supports microbial activity and reduces odors.
Carbon and nitrogen basics
Think of carbon as browns and nitrogen as greens. Aim for roughly 25–30 parts carbon to 1 part nitrogen by weight, which often translates to a 2–3:1 volume ratio of browns to greens in small systems.
- Greens (nitrogen): Vegetable scraps, coffee grounds, fresh grass clippings.
- Browns (carbon): Dry leaves, straw, shredded paper, cardboard.
Examples: Mix one bucket of kitchen scraps with two buckets of shredded leaves or cardboard pieces. Add water if the mix looks dry.
Step-by-Step Composting Process
Follow these steps for a steady, odor-free compost pile.
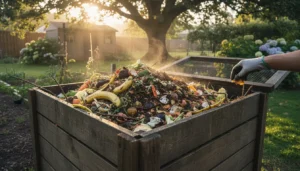
- Start with a layer of coarse browns (twigs or straw) to help airflow at the bottom.
- Alternate layers of greens and browns, keeping greens covered by browns.
- Maintain moisture like a wrung-out sponge: not dry, not dripping.
- Turn or aerate every 1–2 weeks for faster breakdown; in vermicompost systems, avoid heavy turning.
- Harvest finished compost when it is dark, crumbly, and smells earthy (usually 2–6 months depending on method).
Troubleshooting common problems
If the pile smells bad, add more browns and turn to introduce air. If it is too dry, add water and greens. If it is not heating, add more greens or chop materials smaller to increase surface area.
Using Finished Compost
Finished compost mixes well into potting soil, enriches beds, and can be used as a top dressing. Apply a 1–2 inch layer around plants or mix 10–30% compost into garden soil.
Store finished compost in a covered container to preserve nutrients and avoid weed seeds if present.
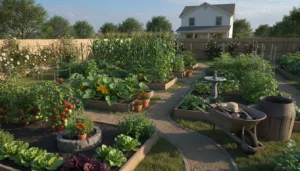
Case Study: Small Backyard Compost System
Anna, a homeowner with a small yard, started a 3-bin compost system. She used one bin for active composting, one for curing, and one for storing browns.
She layered kitchen scraps with shredded leaves, turned weekly, and monitored moisture. After four months she had rich compost used to top-dress her vegetable bed, improving yields the next season.
Key takeaways from the case
- Regular turning and a mix of materials sped decomposition.
- Having separate bins for curing prevented unfinished compost from being used prematurely.
- Local leaves and yard waste cut operating costs and kept the carbon supply steady.
Quick Tips for Home Composting Success
- Chop or shred large items to speed breakdown.
- Keep a small bucket for kitchen scraps and empty it into the bin daily.
- Limit meat, dairy, and oily foods that attract pests.
- Use finished compost as a soil conditioner rather than a sole planting medium.
Home composting for beginners is practical and scalable. Start small, observe the process, and adjust materials and frequency. With basic care you will turn waste into a valuable resource for your garden.