
Why Home Composting Matters
Home composting turns kitchen and yard waste into useful soil conditioner. It reduces landfill waste and feeds plants with natural nutrients.
For beginners, composting is a practical step toward lower waste and healthier gardens. This guide explains simple, reliable methods to start today.
Choose a Home Composting Method
Pick a method that fits your space and time. The three common options are backyard piles, compost bins, and vermicomposting (worm composting).
Backyard Compost Pile
A pile works for larger gardens and yard waste. It needs turning and space but costs little to start.
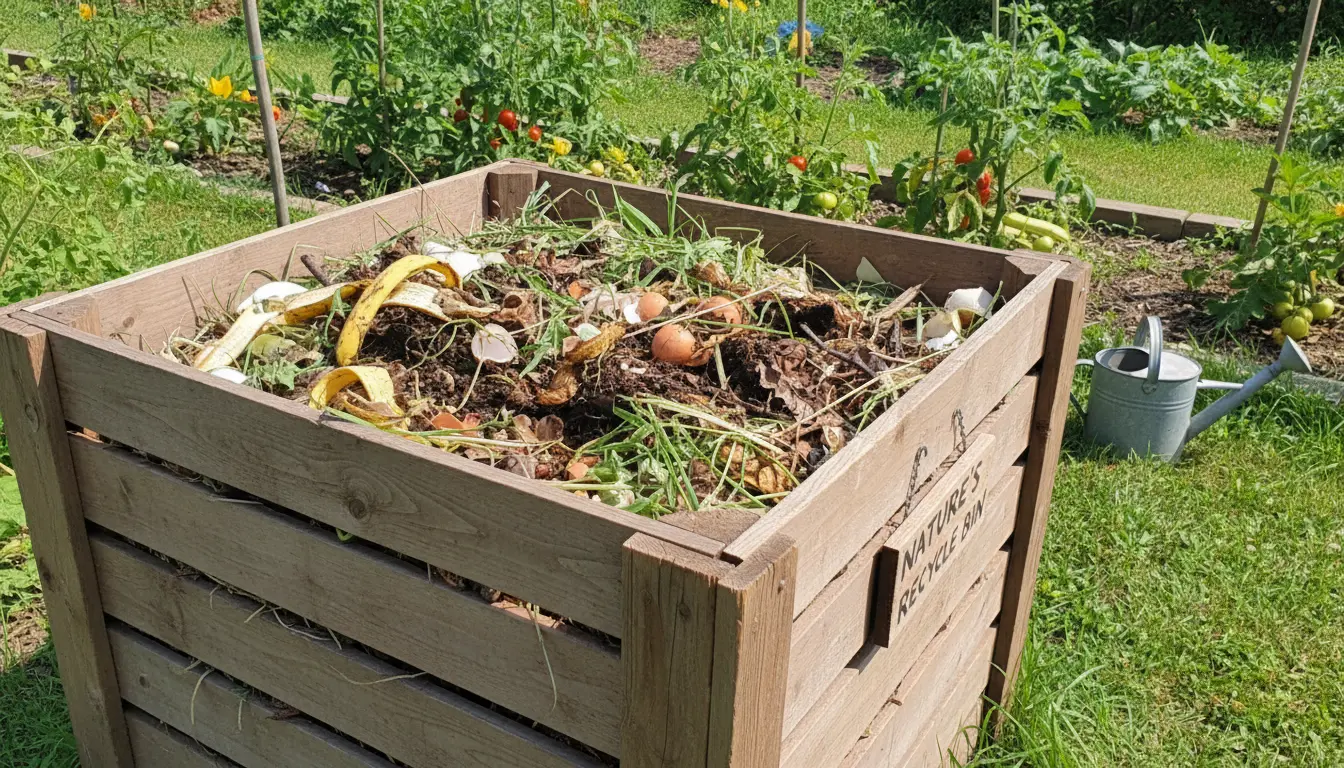
Compost Bin
A bin is tidy and helps maintain heat and moisture. Bins come in plastic or wooden types and are good for small to medium yards.
Vermicomposting
Worms speed up decomposition in small containers. Vermicomposting is ideal for apartments or anyone wanting fast, nutrient-rich castings.
What to Compost: Greens and Browns
Successful composting balances nitrogen rich “greens” with carbon rich “browns.” Aim for a mix that keeps the pile active without smelling.
- Greens (nitrogen): vegetable scraps, fruit peels, coffee grounds, fresh grass clippings.
- Browns (carbon): dried leaves, shredded paper, straw, cardboard, wood chips.
Good ratio guideline: roughly 2 to 3 parts browns to 1 part greens by volume. Adjust based on smell and moisture.
Step-by-Step Start Guide for Home Composting
Follow these steps to create an active compost pile or bin. Keep each step practical and repeatable.
- Choose a shady spot with good drainage for a bin or pile.
- Start with a 10 to 15 cm layer of coarse material for airflow, like small branches or straw.
- Add alternating layers of greens and browns. Keep layers thin to improve mixing.
- Maintain moisture like a wrung-out sponge. Add water in dry weather and cover if heavy rain is expected.
- Turn the pile every 1 to 3 weeks to introduce oxygen and speed decomposition.
- Harvest finished compost in 2 to 6 months depending on method and conditions.
Troubleshooting Common Problems
Beginner composters often face a few predictable issues. Use the following checks to fix them quickly.
- Bad smell: Add more browns and turn the pile. A healthy pile should smell earthy, not foul.
- Too dry: Add water and more greens. Cover the bin to retain moisture.
- Too wet and compacted: Add dry browns and mix to restore airflow.
- Pests: Avoid meat, dairy, oily foods, and fish scraps. Bury food waste in the center of the pile.
How to Tell When Compost Is Ready
Finished compost looks dark, crumbly, and smells like rich soil. Most large pieces are no longer visible and the volume has reduced.
Use a sieve or screen to separate finer compost for seedlings and garden beds. Larger chunks can return to the pile for further breakdown.
Composting can reduce household waste volume by up to 30 to 50 percent. Kitchen scraps and yard waste make up nearly half of what most households discard.
Simple Example: Small Bin Setup
For a balcony or small yard, a 60 liter plastic bin with holes works well. Place drainage holes at the bottom and aeration holes on the sides.
Start with a layer of twigs, then add 5 cm of browns, 2.5 cm of greens, and repeat. Turn the material every week and keep moist. Expect usable compost in 3 to 5 months.
Real-World Case Study: Neighborhood Starter
Case: A two-person household in a suburban area began home composting with a 200 liter tumbler bin. They added kitchen scraps and yard clippings, aiming for a 3:1 brown to green ratio.
Outcome: After four months of turning the tumbler twice weekly and maintaining moisture, they produced about 120 liters of finished compost. They used it to top-dress vegetable beds and reported healthier plants and less grocery waste.
Practical Tips for Ongoing Success
- Chop or shred larger materials to speed decomposition.
- Keep a small counter bucket with a tight lid for kitchen scraps to minimize trips and odors.
- Seasonally balance yard waste—more browns in fall, more greens in spring.
- Use finished compost as mulch, soil conditioner, or potting mix ingredient.
Next Steps
Choose a method that fits your living situation and gather simple tools: a pitchfork or turning tool, a garden thermometer (optional), and containers for scraps.
Start small, observe, and adjust. Composting is practical, low-cost, and becomes easier with routine.
Ready to start? Pick a bin or corner in your yard and begin adding small layers this week. Within months you will have nutrient-rich compost for your plants.