

Why Home Composting Matters
Home composting reduces household waste and returns valuable nutrients to your garden. It saves money on trash pickup and store-bought soil amendments.
For beginners, composting is easy if you use the right mix of materials and keep conditions balanced. This guide breaks the process into clear, actionable steps.
Food waste makes up about one third of household garbage. Composting can cut that number and reduce methane from landfills.
Five Steps to Start Home Composting
These core steps will get you producing compost in a few months. Follow them in order and adjust for your climate and space.
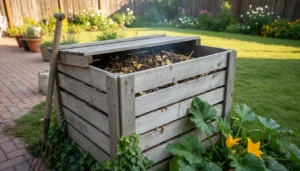
Step 1: Choose a Location and Bin for Home Composting
Pick a level, well-drained spot in the yard or a sunny balcony for small bins. If you have limited space, use a compact tumbling bin or a countertop worm composter.
Bins can be plastic, wood, or wire. Choose one with good airflow and an easy way to turn or mix the pile.
Step 2: Balance Browns and Greens
Compost needs a balance of carbon-rich “browns” and nitrogen-rich “greens.” Browns include dried leaves, straw, and shredded paper.
Greens include kitchen scraps, coffee grounds, and fresh grass clippings. Aim for roughly a 3:1 ratio of browns to greens by volume.
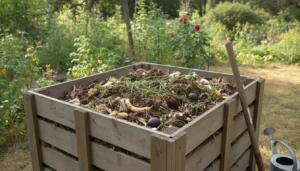
Step 3: Build the Pile Correctly
Start with a 4-6 inch base of coarse browns to help airflow. Add alternating layers of greens and browns, keeping layers thin.
Moisten each layer so it feels like a wrung-out sponge. Too dry and decomposition slows; too wet and the pile smells.
Step 4: Turn and Monitor Your Compost
Turning mixes oxygen into the pile and speeds decomposition. Aim to turn your pile every 1–2 weeks for faster results.
Check temperature and moisture. A properly active pile warms to 120–140°F (50–60°C); cooler piles still work but take longer.
Step 5: Harvest and Use Finished Compost
Compost is ready when it is dark, crumbly, and earthy-smelling. This can take 2 months to a year depending on method and materials.
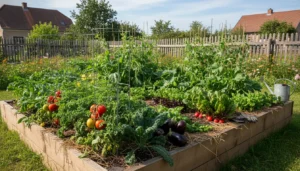
Use finished compost to top-dress lawns, mix into potting soil, or enrich garden beds. A little goes a long way.
What to Compost and What to Avoid
Knowing what goes in the pile keeps pests away and speeds results. Use the lists below to stay safe and efficient.
- Good to compost: fruit and vegetable scraps, coffee grounds, eggshells, yard trimmings, shredded paper, leaves, and cardboard.
- Avoid or limit: meat, dairy, bones, greasy foods, diseased plants, and pet waste. These attract pests and can create odors.
- Optional: wood ash in small amounts for alkaline soils, but avoid using with acid-loving plants.
Compost Troubleshooting and Tips for Home Composting
Common problems are odors, pests, and slow breakdown. Most issues are easy to fix with balance and simple actions.
- Bad smell: Add more dry browns, turn the pile, and check drainage. Smells usually mean too much moisture or food waste exposed.
- Pests: Bury food scraps beneath a layer of browns and use a closed bin if rodents are a concern.
- Slow composting: Chop materials small, increase greens slightly, and turn more often to add oxygen.
- Cold climate: Insulate your bin, use a smaller pile, or compost indoors with worm bins during winter.
Small Case Study: Apartment Balcony Composting
Maria, a city resident, used a 20-liter lidded compost bin on her balcony. She added kitchen scraps and shredded paper and harvested usable soil in six months.
She turned the bin weekly and kept a small container with baking soda to control smells. Her balcony herbs improved with the compost top-dress.
Tools and Materials Checklist for Home Composting
Start simple and add tools as needed. Most beginners succeed with basic supplies.
- Compost bin or tumbler
- Pitchfork or turning tool (or a tumbler)
- Garden thermometer (optional)
- Kitchen scrap container with a lid
- Browns supply: shredded paper, dry leaves, or straw
Examples of Composting Methods for Different Homes
Choose a method that fits your space and time. Below are quick options to consider.
- Backyard pile: Good for yards and larger volumes. Needs space and occasional turning.
- Tumbling bin: Easier to turn and faster composting. Ideal for medium-sized gardens.
- Worm bin (vermicomposting): Great for apartments and producing nutrient-rich castings. Requires indoor care.
Getting Started Today
Gather a bin, collect kitchen scraps, and layer with dry browns. Start small and observe changes each week.
Record what you add and how the pile responds. With a little attention, you will produce useful compost and reduce waste.
Quick Home Composting Checklist
- Choose bin and location.
- Collect greens and browns separately.
- Layer and moisten to sponge consistency.
- Turn regularly and monitor smell and moisture.
- Harvest when dark and crumbly.
Follow these steps and adjust for your climate and materials. Home composting is practical, affordable, and one of the easiest ways to improve soil health and cut household waste.