
Composting at home turns kitchen and yard waste into a useful soil amendment. This guide explains how to set up a home compost bin, what to add, and how to keep the process working smoothly.
Why a Home Compost Bin Matters
A home compost bin reduces landfill waste and creates nutrient-rich compost for gardens. It helps retain moisture in soil and improves plant health without store-bought fertilizers.
Composting also lowers household greenhouse gas emissions by diverting organic waste from anaerobic landfill conditions.
Choosing a Compost Bin
Choose a bin that fits your space and needs. Options include tumblers, wooden bins, plastic bins, and simple pile composting.
- Tumbler: Easier turning, good for small yards.
- Wooden or pallet bin: Affordable and scalable.
- Plastic bin: Low maintenance and pest resistant.
- Open pile: Best for large yards with space.
Where to Place Your Home Compost Bin
Locate the bin on soil or grass to allow drainage and access to beneficial microbes. A partly shaded spot keeps moisture balanced and prevents excessive drying.
Keep it convenient to the kitchen so adding food scraps is quick and consistent.
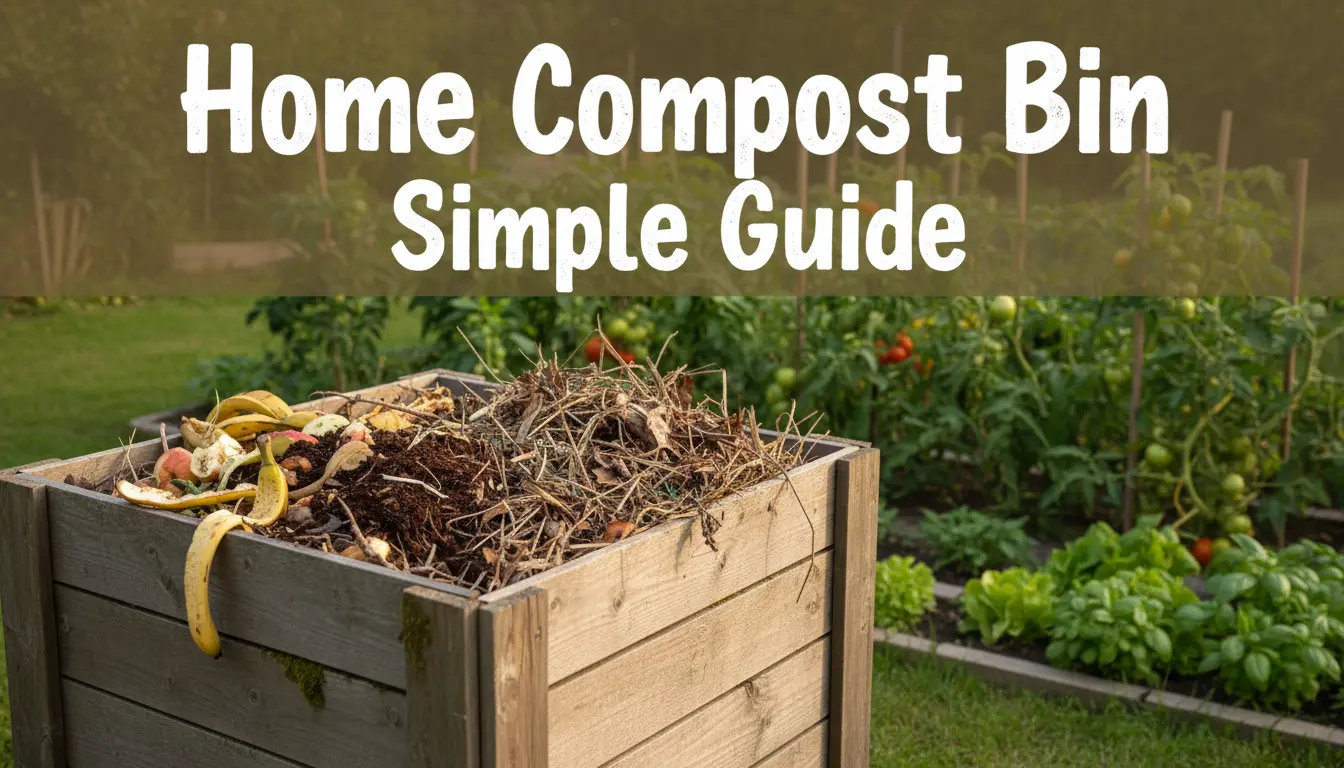
What to Add to Your Compost Bin
Compost needs a mix of ‘greens’ (nitrogen) and ‘browns’ (carbon). Balancing these materials speeds decomposition and limits odors.
- Greens: Vegetable scraps, fruit peels, coffee grounds, fresh grass clippings.
- Browns: Dry leaves, shredded paper, cardboard, straw, wood chips.
A common ratio is about 2–3 parts browns to 1 part greens by volume. Adjust based on how fast the pile heats and how it smells.
Materials to Avoid in a Home Compost Bin
Do not add meat, dairy, oily foods, diseased plants, or pet waste to a basic home compost bin. These items attract pests and can create foul odors.
If you want to compost meat or pet waste, use a specially managed hot compost system or a certified pet-waste composter.
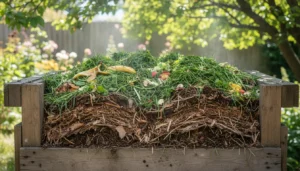
How to Build and Maintain a Home Compost Bin
Start with a layer of coarse browns at the bottom for aeration. Add alternating layers of greens and browns as you collect materials.
Turn or mix the pile every 1–2 weeks to add oxygen and speed decomposition. If using a tumbler, rotate it according to manufacturer guidance.
Monitoring Moisture and Temperature
The compost should feel like a wrung-out sponge. Add water during dry periods and add more browns if the pile becomes too wet or slimy.
Temperature tells you how active the microbes are. A warm center (between 100–140°F or 38–60°C) indicates active decomposition, while lower temperatures mean slower activity.
Troubleshooting Common Problems
Bad smells: Usually due to too much green material or poor aeration. Fix by adding dry browns and turning the pile.
Slow breakdown: Add more greens or smaller-sized materials to increase microbial activity. Chopping materials speeds up composting.
Pests: Avoid adding meat and keep the bin covered. Use a secure, pest-resistant container if animals are a concern.
Composting can cut household waste by up to 30 percent and returns valuable nutrients to your garden soil.
When Is Compost Ready to Use?
Finished compost is dark, crumbly, and smells earthy. It should no longer resemble the original materials and will have a stable, soil-like texture.
Screen it if you want finer compost. Use larger pieces back in the bin to continue breaking down.
How to Use Finished Compost
Mix compost into garden beds at a rate of 1–3 inches across the surface before planting. Use as potting mix amendment at about 10–20 percent of the total volume.
Compost is great as a top-dressing for lawns and around ornamentals to improve soil structure and nutrient content.
Small Real-World Example
Case study: Sarah, a city gardener, started a 50-gallon tumbler on her apartment balcony. She added kitchen scraps and shredded mail, turning the tumbler weekly.
After three months she produced enough compost to refresh three balcony planters. Her plants responded with healthier foliage and better flowering.
Practical Tips for Success
- Collect scraps in a small countertop bin to make composting a habit.
- Chop or shred large materials to speed decomposition.
- Keep a balance of browns and greens; if in doubt, add more browns.
- Record when you add major batches to monitor progress.
Quick Checklist to Start a Home Compost Bin
- Choose a bin: tumbler, plastic, or wooden.
- Select a location: shaded, level spot on soil.
- Gather materials: greens and browns.
- Layer and maintain: water, turn, monitor smell.
- Harvest finished compost and use in garden beds.
Starting a home compost bin is a low-cost, high-benefit way to reduce waste and improve garden soil. With a little attention to balance and aeration, most households can produce quality compost within a few months.