

Overview of Composting at Home
Composting at home turns food scraps and yard waste into rich soil that improves plant health. It reduces landfill waste and lowers household disposal costs.
This guide explains practical steps you can follow whether you have a backyard, balcony, or a small kitchen counter.
Why Choose Composting at Home

Composting at home supplies nutrients to your garden and reduces the need for chemical fertilizers. It also cuts methane emissions from landfills by diverting organic waste.
Many cities offer curbside composting, but doing it yourself saves money and gives you usable compost for potted plants and beds.
What You Need for Composting at Home
Getting started is simple. You need a container, a mix of materials, and a little attention. The right choices depend on space and local rules.
Basic materials
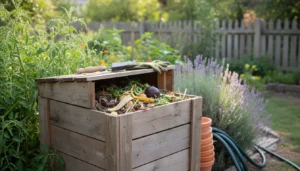
- Container: tumbler, bin, pile, or worm bin for indoors
- Brown materials: dry leaves, shredded paper, cardboard
- Green materials: vegetable scraps, coffee grounds, fresh grass clippings
- Air and water: a spot with some airflow and occasional moisture
Tools and extras
- Pitchfork or turning tool for larger bins
- Kitchen caddy for collecting scraps
- Thermometer to monitor heat (optional)
Step-by-Step Composting at Home
Follow a simple routine to keep the process efficient. The core idea is balance: mix browns and greens, keep it moist, and supply oxygen.
Step 1: Choose a system
Pick a compost solution that fits your space. Tumblers work well for neat backyards. Piles are fine if you have room. Worm bins are ideal for apartments.
Step 2: Build your pile
Start with a layer of coarse material for drainage. Add alternating layers of greens and browns. Aim for a ratio near 1 part greens to 3 parts browns by volume.
Step 3: Maintain composting at home
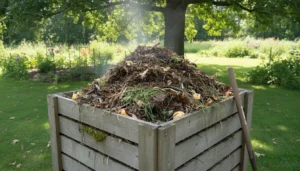
Keep the pile as damp as a wrung-out sponge. Turn the pile every 1–2 weeks to introduce oxygen. If a tumbler is used, rotate it regularly to speed decomposition.
Step 4: Harvest finished compost
Compost is ready when it looks dark, crumbly, and smells earthy. Sift out large pieces and return them to the pile to finish breaking down.
Troubleshooting Composting at Home
Problems are usually easy to fix with small adjustments. Use these quick checks before changing your whole system.
Bad smells
An ammonia or rotten smell means too many greens or poor aeration. Add brown material and turn the pile to restore balance.
Pests
To discourage flies and rodents, bury food scraps under a layer of browns. Use a closed bin or lid in areas where pests are common.
Slow decomposition
Slow breakdown often results from low temperatures, excess dryness, or too many large pieces. Chop larger items, add water if dry, and turn the pile to raise temperature.
Practical Tips for Small Spaces
Composting at home is possible without a backyard. Use a worm bin (vermicomposting) or an indoor bokashi kit for fermented pre-composting.
- Worm bins: good for apartment kitchens, keep them in a cool, dark spot.
- Bokashi: allows you to compost meat and dairy by pre-fermenting in a sealed bucket.
- Community gardens: drop off compostable material if home options are limited.
Composting at home can reduce household waste by up to 30 percent and return vital nutrients to the soil, improving water retention and plant resilience.
Small Case Study: Apartment Composting Success
Case study: Maria lives in a two-bedroom apartment and started a worm bin on her balcony. She used a small kitchen caddy to collect coffee grounds and vegetable scraps.
Within three months, Maria had enough worm castings to repot herbs and improve soil health in her balcony planters. Her trash volume dropped by one bag per week.
Examples of What to Compost and What to Avoid
Knowing what to put in your bin keeps the process smooth and pest-free. Use this quick reference when you sort kitchen waste.
- Compostable: fruit and vegetable scraps, eggshells, coffee grounds, tea bags, shredded paper, yard trimmings
- Avoid: meat, dairy, oily foods, diseased plants, pet waste (unless using specialized systems)
Final Checklist for Starting Composting at Home
- Choose a container that fits your space and needs.
- Collect a balance of browns and greens.
- Keep the pile moist and aerated.
- Turn or rotate regularly to speed decomposition.
- Harvest finished compost and reuse it in the garden.
Composting at home is a practical step toward waste reduction and healthier plants. Start small, observe results, and adjust your process to fit your household. With regular, simple care you can create rich compost and reduce your environmental footprint.