

Composting at home turns kitchen scraps and yard waste into valuable soil. This guide gives clear, practical steps you can follow today to start home composting with confidence.
Why composting at home matters
Home composting reduces landfill waste and lowers methane emissions from trash. It also returns nutrients to soil, improving plant health and water retention.
Benefits of home composting
Composting creates free fertilizer that supports healthier gardens and saves money. It also teaches sustainable habits and reduces your overall household waste footprint.
Food scraps and yard trimmings make up nearly 30% of household waste, much of which can be composted instead of landfilled.
How to start composting at home: basic steps
Starting home composting requires only a few items: a container, a mix of materials, and some simple maintenance. Follow these basic steps to build your first compost pile or bin.
- Choose a composting container or area.
- Gather brown (carbon) and green (nitrogen) materials.
- Layer materials, keep the pile moist, and turn regularly.
- Allow time for decomposition until the compost is dark and crumbly.
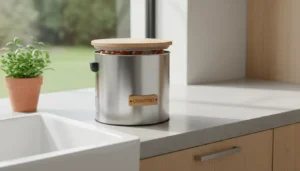
Choosing a container for composting at home

You can use a purchased compost bin, a homemade wooden bin, or a simple pile in the backyard. For small spaces or balconies, consider a worm bin (vermicomposting) or tumblers designed for compact use.
Place bins in a partly shaded area to maintain steady moisture and avoid overheating. Ensure good drainage and airflow around the container to speed decomposition.
What to compost and what not to compost
Balance carbon-rich “browns” and nitrogen-rich “greens” for effective home composting. Browns include dry leaves, paper, and straw, while greens include vegetable scraps, coffee grounds, and fresh grass clippings.
- Good browns: dry leaves, cardboard (shredded), straw, paper towels.
- Good greens: fruit and vegetable scraps, coffee grounds, fresh garden waste.
- Avoid: meat, dairy, oils, diseased plants, and pet feces.
Home composting methods to choose from
Select a method that matches your space, time, and preferred level of involvement. Each method has specific steps and benefits for home composting.
Cold composting
Cold composting is low effort: add materials as they become available and let nature do the work. This method takes longer—often 6–12 months—but requires minimal turning.
Hot composting
Hot composting requires building a larger pile with balanced browns and greens and regular turning. It produces finished compost faster, typically in 1–3 months, but needs more active management.
Vermicomposting (worm bins)
Vermicomposting uses red worms to break down food scraps in small bins, ideal for apartments and indoor use. Worm bins are efficient and produce rich castings for potted plants and gardens.
Maintaining your compost: tips for success
Proper maintenance speeds decomposition and prevents odors. Keep an eye on moisture, aeration, and particle size to maintain a healthy microbial environment.
- Moisture: Compost should feel like a wrung-out sponge. Add water or dry brown material to adjust.
- Aeration: Turn the pile every 1–3 weeks to add oxygen and prevent anaerobic smells.
- Particle size: Chop or shred larger items to speed breakdown.
Troubleshooting common problems in home composting
If the pile smells bad, it likely lacks air—turn it and add dry browns. If decomposition is slow, add greens and increase surface area by chopping materials.
Pests can be deterred by avoiding meat, burying scraps inside the pile, and using a closed bin or mesh cover. For worm bins, maintain temperatures below about 80°F to keep worms healthy.
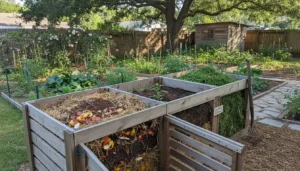
Small real-world example: a simple case study
Case study: Jane, a homeowner with a small yard, started composting at home using a 3-bin system. She balanced kitchen scraps with shredded leaves and turned the middle bin every two weeks.
Within four months, Jane had dark, crumbly compost to mix into her vegetable beds. Her tomato plants produced noticeably more fruit, and she cut weekly trash by nearly half.
Using finished compost in your garden
Finished compost looks dark and crumbly with an earthy smell. Use it as a soil conditioner, top-dressing, or potting mix amendment to improve structure and nutrient content.
Mix compost into garden beds at a rate of 1–3 inches on top of soil, or blend 10–20% compost into potting mixes for container plants. Start small and observe plant response.
Quick checklist to start composting at home
- Choose a bin suitable for your space (pile, tumbler, worm bin).
- Collect browns and greens and keep them balanced.
- Monitor moisture and aeration, and turn periodically.
- Harvest finished compost when dark and crumbly.
Composting at home is a practical way to reduce waste and nourish your garden. Start with a simple system and refine your process as you gain experience.