

Why Home Composting for Beginners Matters
Home composting turns kitchen scraps and yard waste into nutrient-rich soil. It reduces landfill waste and lowers your household carbon footprint.
This guide explains simple, actionable steps so you can start composting today without feeling overwhelmed.
Choose a System for Home Composting for Beginners
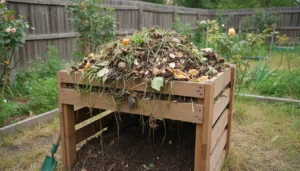
Select a composting method that fits your space and schedule. Common options work well for beginners and require little maintenance.
- Open pile: Best for large yards and simple mixing.
- Stationary bin: Contained and tidy for medium yards.
- Tumbler: Easier turning, faster results, ideal for small gardens.
- Worm bin (vermicompost): Great for apartments and indoor composting.
What You Need to Start
Gather simple supplies before you begin to make the process smoother. Most items are inexpensive or already at home.
- Compost bin or tumbler
- Garden fork or turning tool
- Kitchen scrap container with a lid
- Browns (dry leaves, shredded paper) and greens (vegetable scraps, coffee grounds)
Balance Greens and Browns
Understanding the carbon to nitrogen ratio is key to effective composting. For beginners, aim for a simple balance that mimics natural decay.
Use a mix of carbon rich materials and nitrogen rich materials in roughly equal parts by volume.
- Greens (nitrogen): vegetable scraps, fruit peels, coffee grounds, fresh grass clippings.
- Browns (carbon): dry leaves, straw, cardboard, shredded paper, wood chips.
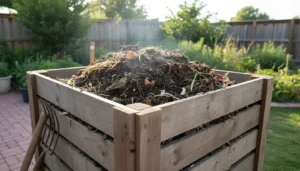
How to Layer and Maintain
Layer greens and browns in your bin to maintain airflow and moisture. Too wet or packed material slows decomposition.
- Start with a layer of coarse browns for drainage.
- Add a layer of greens, then cover with browns.
- Turn or mix every 1 to 2 weeks to add oxygen.
- Keep the pile as moist as a wrung-out sponge.
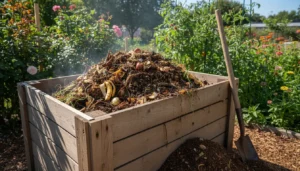
Troubleshooting Common Problems in Home Composting for Beginners
Beginners often face similar issues. Small adjustments usually fix them quickly without abandoning the process.
- Bad smells: Add more browns and turn the pile. Smells usually mean too much nitrogen or poor airflow.
- Pests: Use a closed bin, bury food scraps under browns, and avoid meat or dairy.
- Slow breakdown: Chop materials smaller, increase moisture slightly, and turn more often.
- Excess heat: Large piles can get very hot. If too hot, turn the pile and add browns to cool it.
How Long Until Compost Is Ready?
Time depends on method, materials, and how often you turn the pile. Typical ranges are a few months to a year.
- Tumbler: 2 to 6 months with regular turning.
- Open pile or bin: 6 to 12 months with occasional turning.
- Vermicompost: 2 to 4 months for usable castings in an active system.
Using Finished Compost
Finished compost looks dark, crumbly, and earthy-smelling. It should not contain recognizable food scraps.
Use finished compost to enrich garden beds, potting mixes, or as a top dressing for lawns and houseplants.
- Soil amendment: Mix 1 part compost to 3 parts soil for planting beds.
- Mulch: Apply a 1 to 2 inch layer around plants to retain moisture.
- Seed starting: Use a lightweight mix with added compost for seed trays.
Simple Schedule for Home Composting for Beginners
Follow a weekly routine to keep the process steady without extra time pressure.
- Daily: Empty kitchen scraps into outdoor bin or worm bin.
- Weekly: Add a layer of browns and turn the pile if using a cold compost method.
- Monthly: Check moisture and temperature, chop larger pieces if needed.
Small Case Study: Local Apartment Worm Bin
Jane, a renter in a small apartment, started a worm bin with kitchen scraps and shredded paper. After three months she had rich worm castings for her balcony plants.
The system required minimal space and reduced her trash by about half. Her success shows vermicomposting is practical in small living spaces.
Safety and Local Rules
Check local regulations about composting, especially in urban areas. Some neighborhoods restrict outdoor bins or certain methods.
Avoid adding pet waste, meat, dairy, or diseased plants to home compost to reduce risks to people and animals.
Quick Tips for Success
- Chop or shred materials to speed decomposition.
- Keep a small covered container in the kitchen for scraps to make composting easy.
- Rotate locations of compost additions to avoid compacting one area.
- Be patient: composting is a natural process and improves with practice.
Starting with simple steps and steady habits makes home composting for beginners manageable and rewarding. Use this guide as a checklist and adjust methods to fit your home and lifestyle.