
Getting Started with Home Composting for Beginners
Home composting turns kitchen scraps and yard waste into nutrient-rich soil. It reduces waste and improves garden health without complex equipment.
This guide gives clear steps you can follow whether you have a backyard, balcony, or small indoor space.
Choose a Compost System
Pick a system that fits your space and lifestyle. Options include a simple pile, a tumbling bin, or a worm composting (vermicompost) setup.
- Backyard bin: Good for yards and larger volumes.
- Tumbler: Easier turning and faster composting.
- Worm bin: Works indoors and processes food scraps quickly.
What to Compost: Home Composting for Beginners
Successful composting depends on a mix of carbon and nitrogen materials. Aim for a roughly 3:1 ratio of browns to greens by volume.
- Greens (nitrogen): fruit and vegetable scraps, coffee grounds, fresh grass clippings.
- Browns (carbon): dry leaves, shredded paper, cardboard, straw.
- Avoid: meat, dairy, oils, diseased plants, and pet waste to prevent odors and pests.
Example Mixes
Easy starter mixes to try:
- 1 wheelbarrow of leaves + 1 bucket of kitchen scraps + water to moisten.
- Shredded cardboard layered with vegetable peels and yard clippings.
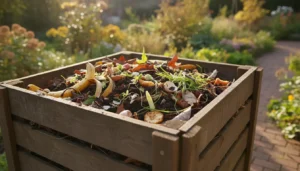
How to Build Your Compost Pile
Location matters. Place the pile on bare soil if possible to allow organisms and drainage. Keep it convenient to access from the kitchen or garden.
Layer materials, starting with coarse browns to help airflow, then alternate greens and browns. Aim for piles at least 1 cubic meter if possible, but smaller works too.
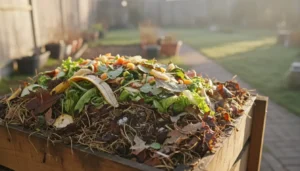
Maintaining Your Compost
Proper moisture, aeration, and particle size speed decomposition. The pile should feel like a wrung-out sponge — damp but not soggy.
- Turn or mix the pile every 1–2 weeks if using a static bin.
- Use a tumbler for easier turning and faster results.
- Chop larger items to increase surface area and quicken breakdown.
Troubleshooting Common Problems
Bad smells usually mean too much nitrogen or too little air. Add dry browns and turn the pile.
If the pile is dry, add water and more greens. Slow breakdown often means the pile is too small or too cold — add more material and insulate with a tarp.
Compost can reduce household waste by up to 30% and return nutrients to soil, improving water retention and plant health.
Using Finished Compost
Finished compost is dark, crumbly, and earthy-smelling. It typically takes 2–12 months depending on method and climate.
- Use as a soil amendment: mix into garden beds at 10–20% by volume.
- Top-dress lawns or potted plants with a thin layer of compost to boost nutrients.
- Make compost tea: steep finished compost in water for a gentle fertilizer spray.
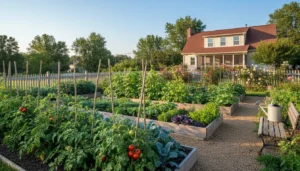
Small Real-World Case Study
Case: A suburban family started a 200-liter tumbling composter in spring. They added kitchen scraps and yard clippings and turned the tumbler twice weekly.
In six months they produced about 120 liters of usable compost. The family reduced trash bags from weekly to biweekly and used compost to improve vegetable beds, seeing healthier tomato plants and higher yields.
Tips for Successful Home Composting for Beginners
- Keep a small countertop bin with a tight lid to collect scraps and empty it regularly.
- Balance greens and browns; if in doubt, add more browns to avoid odors.
- Record what you add and how often you turn — this helps you learn what works for your climate.
- Use a mesh or hardware cloth to deter pests if you have wildlife issues.
Quick Checklist
- Choose the right bin for your space.
- Collect scraps and store them in a sealed container until composting.
- Layer materials and maintain moisture and aeration.
- Harvest finished compost and apply it to soil.
Home composting is a low-cost, practical way to manage organic waste and build healthier soil. Start small, adjust as you learn, and you’ll see steady benefits in your garden and trash bills.