
Home composting turns kitchen scraps and yard waste into useful soil material. This guide gives practical steps you can follow, whether you have a backyard, balcony, or shared yard.
How Home Composting Works
Composting is a controlled decomposition process where microbes break down organic matter into stable humus. The key elements are carbon, nitrogen, water, oxygen, and time.

Balancing these elements speeds up decomposition and reduces odors. With the right setup you can turn most food scraps and yard trimmings into rich compost for plants.
Getting Started with Home Composting
Choose a compost method that matches your space and commitment. The most common options are pile composting, bin composting, and vermicomposting (worms).
Choosing a Compost Bin
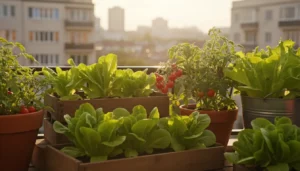
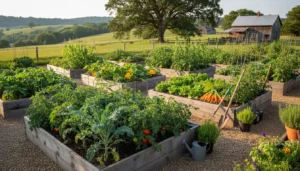
Select a bin based on volume and access. For a backyard, a 3×3 foot bin holds enough material for typical households. For apartments, a small indoor tumbler or worm composting bin works well.
- Backyard bin: good airflow and capacity.
- Compost tumbler: faster mixing and less turning effort.
- Worm bin: ideal for kitchens and small spaces.
Location and Setup
Place your bin on soil or a breathable surface. Avoid paved areas because soil contact helps microbes and drainage. A partly shaded spot prevents overheating in summer.
For bins, add a layer of coarse material like twigs at the bottom for airflow and drainage. Ensure easy access for turning and removing finished compost.
What to Compost: Greens and Browns
Composting relies on mixing nitrogen-rich “greens” and carbon-rich “browns.” A balanced mix creates heat and sustains microbial activity.
- Greens (nitrogen): fruit and vegetable scraps, coffee grounds, fresh grass clippings.
- Browns (carbon): dry leaves, shredded paper, cardboard, straw.
Aim for roughly a 2:1 or 3:1 ratio of browns to greens by volume. If your pile is too wet or smelly, add more browns. If decomposition stalls, add more greens and water.
Maintenance: Turning, Moisture, and Temperature
Turning the pile introduces oxygen and speeds composting. For hot composting, turn every 1–2 weeks. For slower systems, turn monthly or when material looks compacted.
Moisture should feel like a wrung-out sponge. Too dry and microbes slow down; too wet and anaerobic conditions cause odors. Add water or dry browns to adjust.
Temperature indicates activity. A hot pile (130–150°F / 54–66°C) breaks down material quickly and kills seeds. Cooler piles work, but take longer.
Troubleshooting Common Problems
Bad smells: usually due to anaerobic conditions. Fix by turning the pile and adding dry browns.
Pests: avoid putting meat, dairy, oily foods, or large amounts of citrus in the pile. Use a closed bin or bury new scraps deeper to deter animals.
Slow decomposition: check moisture and balance of greens and browns. Chop large items into smaller pieces to increase surface area.
Using Finished Compost
Compost is ready when it is dark, crumbly, and has a pleasant earthy smell. Screen out large pieces and return them to a new pile for further breakdown.
Use finished compost as a soil amendment, potting mix ingredient, or mulch. For planting beds, apply 1–3 inches of compost and work it into the topsoil.
Small Case Study: Composting in a Two-Person Apartment
Emma and Luis live in a two-bedroom apartment and started vermicomposting in a 20-liter worm bin. They collected kitchen scraps in a small counter caddy and fed the worms daily.
After six months they produced enough worm castings to refresh two balcony planters. They cut their weekly trash organic weight by roughly 60 percent and saved on store-bought potting mix.
Practical Tips and Quick Checklist
Keep these simple rules in mind as you begin:
- Start small: begin with a manageable bin size and increase as you gain confidence.
- Chop material: smaller pieces decompose faster.
- Balance greens and browns: prevents odors and speeds processing.
- Monitor moisture: maintain a damp but not soggy pile.
- Turn regularly: helps aeration and speeds composting.
Example Weekly Routine
- Day 1: Add kitchen scraps and a handful of dry leaves or shredded paper.
- Day 3: Check moisture and add water if dry.
- Day 7: Turn or mix the pile; add more browns if needed.
Home composting is a low-cost, effective way to reduce waste and improve soil health. With modest effort and the right balance, most households can produce useful compost within a few months.
Start with a small system, follow the balance rules, and adapt based on what you observe. Composting rewards regular, simple care with long-term benefits for plants and waste reduction.