

Home Composting Basics
Home composting turns kitchen and yard waste into a useful soil amendment. It reduces landfill waste and improves garden soil with minimal cost.
This guide explains practical steps to start home composting, materials to use, common problems, and a short case study to show real results.
Why Choose Home Composting
Composting reduces organic waste, lowers householder fees in some areas, and closes the nutrient loop for your garden. It is a simple sustainable habit anyone can adopt.
Even small apartments can compost with a suitable method, while yards can handle larger bins or piles.
Composting can divert up to 30 percent of household waste from the trash when food scraps and yard trimmings are composted instead of thrown away.
Materials for Home Composting
Successful compost needs the right balance of carbon and nitrogen. Use a mix of both for faster decomposition and less odor.
Carbon Rich (Browns)
- Dry leaves, shredded paper, cardboard
- Wood chips and straw
Nitrogen Rich (Greens)
- Fruit and vegetable scraps, coffee grounds
- Fresh grass clippings and plant trimmings
Aim for roughly a 3:1 ratio of carbon to nitrogen by volume. If the mix is too wet or smelly, add more browns. If decomposition is slow, add greens and water.
How to Start Home Composting
Choose a method that fits your space and schedule. Common options include a simple compost bin, a tumbler, or a worm bin for indoor composting.
Step-by-step Setup
- Select a container: a 3-bin system, single bin, or tumbler works for most yards.
- Pick a location: partial shade with good drainage is ideal.
- Add a base layer of coarse material to improve airflow, like twigs.
- Alternate layers of greens and browns, keeping the pile moist like a wrung-out sponge.
- Turn the pile every 1–2 weeks to add oxygen and speed up decomposition.
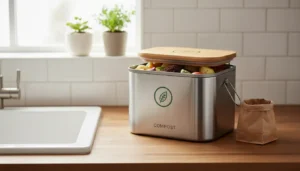
For apartment dwellers, a small worm composting (vermicompost) bin or a sealed bokashi system can handle food scraps indoors with minimal odor.
Maintenance Tips for Home Composting
Routine checks keep a compost pile healthy. Watch for moisture, smells, and pests, and adjust materials as needed.
- Moisture: Add water if dry, add browns if too wet.
- Temperature: A warm interior (40–60°C/105–140°F) means active composting; cool piles decompose slowly.
- Turning: Regular turning reduces time to finished compost and prevents odors.
Testing readiness: Finished compost is dark, crumbly, and smells earthy. Large pieces of undecomposed matter can be screened out and returned to the pile.
Common Problems and Solutions
Address issues quickly with simple fixes. Most problems arise from moisture imbalance, poor aeration, or wrong materials.
- Smelly pile: Add dry browns and turn the pile to increase oxygen.
- Slow decomposition: Chop materials smaller, add greens, and keep the pile moist.
- Pests: Avoid meat, dairy, and oily foods; use a sealed bin or bury scraps in the center.
Home Composting Systems Compared
Choose a system based on space, budget, and how quickly you want finished compost.
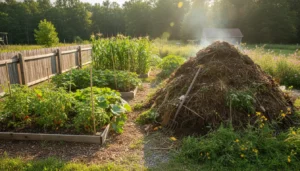
- Open pile: Lowest cost, needs space and turning.
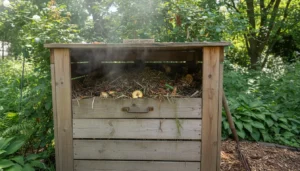
- Closed bin: Tamer appearance, reduces pests, moderate cost.
- Tumbler: Faster results with simple turning, higher cost.
- Vermicompost: Best for apartments, produces nutrient-rich worm castings.
Small Real-World Case Study
Case Study: Emma’s Apartment Composting
Emma lives in a two-bedroom apartment and started a small worm bin on her balcony. She used a 20-liter plastic bin with a lid and red wiggler worms.
After six months she collected 25 liters of worm castings and reduced her kitchen waste by about 60 percent. She used the castings mixed with potting soil for her balcony vegetables, which grew faster and looked healthier.
Key lessons: regular small feedings, avoiding citrus and onion overload, and keeping the bin in a shaded spot kept the system trouble-free.
Using Finished Compost
Apply finished compost to garden beds, mix it into potting soil, or use as a top dressing for lawns. It improves soil structure, water retention, and nutrient content.
Typical application rates: 1–3 inches of compost as a top dressing or 10–25% mixed into potting or garden soil for new plantings.
Final Practical Checklist
- Choose the right method for your space (bin, tumbler, or worms).
- Balance browns and greens, aim for 3:1 carbon to nitrogen.
- Keep the pile moist and aerated; turn regularly.
- Monitor for pests and odors and adjust materials.
- Harvest and use finished compost to improve your soil.
Home composting for beginners is achievable with a bit of planning and regular, simple care. Start small, learn from the process, and scale up when ready.