
Home composting turns kitchen and yard waste into nutrient-rich soil amendment. This guide explains practical steps to start and maintain a home compost system, whether you have a backyard or a small balcony.
Why Home Composting Matters
Composting reduces household waste sent to landfills and returns carbon and nutrients to the soil. It also lowers methane emissions and cuts down the need for store-bought fertilizers.
Even small-scale composting supports healthier plants and a more resilient garden ecosystem.
How to Start Home Composting
Starting is simple: choose a method, assemble materials, and manage the mix. Follow these basic steps to get a reliable compost pile or bin going.
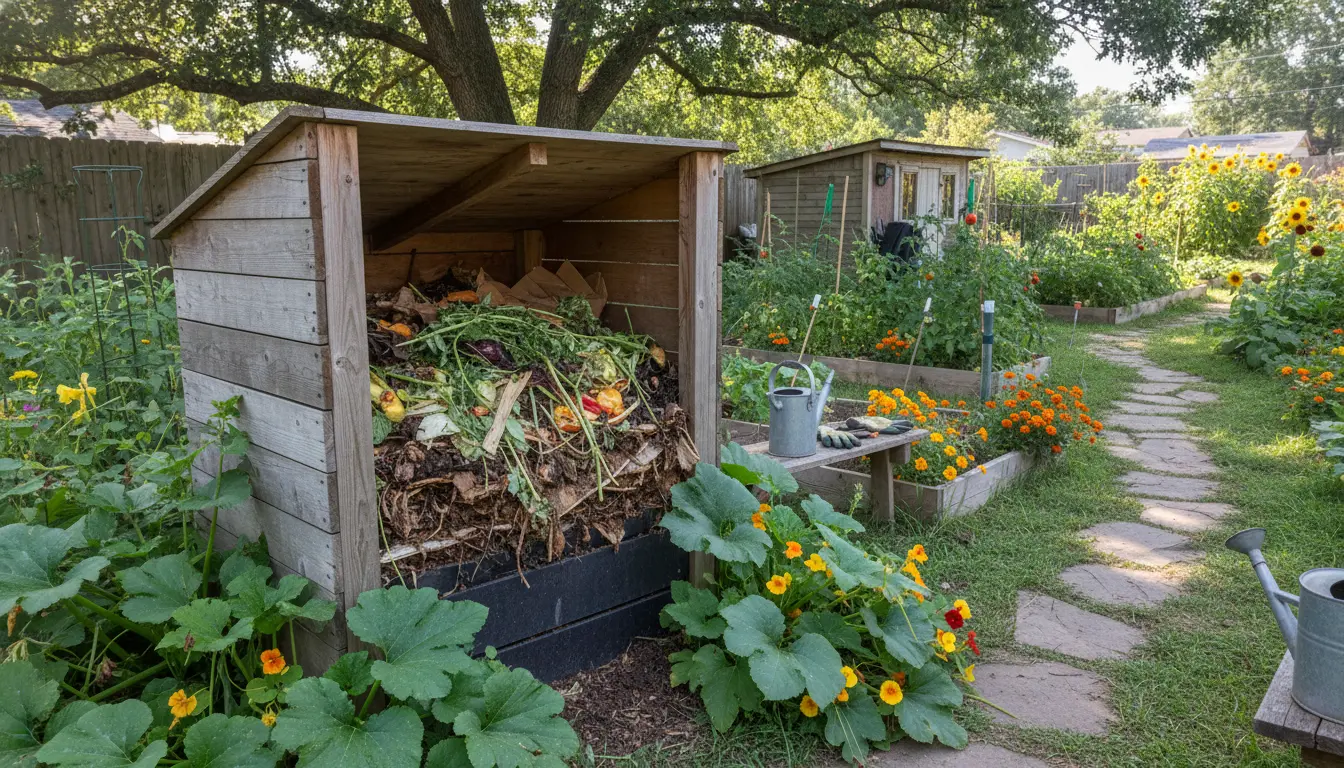
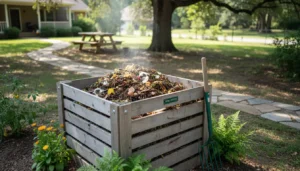
1. Choose a Composting Method
Select a system that fits your space and routine. Common options include open piles, tumblers, and countertop collection with a backyard bin.
- Open pile: Low cost, needs space and periodic turning.
- Tumbler: Faster, contained, easy to turn by rotating.
- Worm bin (vermicompost): Great for apartments, uses worms to process food scraps.
2. Choose a Location
Place the bin on soil if possible to allow organisms to migrate in. Pick a spot with some shade to prevent drying and easy access for adding materials and turning.
For balconies, use a sealed container or vermicompost setup to avoid pests and odors.
What to Compost: Browns and Greens
Successful composting depends on balancing carbon-rich “browns” and nitrogen-rich “greens.” Aim for roughly a 3:1 browns-to-greens volume ratio.
- Greens (nitrogen): Fruit and vegetable scraps, coffee grounds, fresh grass clippings.
- Browns (carbon): Dry leaves, shredded paper, cardboard, straw, wood chips.
Avoid meat, dairy, oily foods, and pet waste in typical home systems; these attract pests and slow decomposition.
Layering and Adding Materials
Start with a layer of coarse browns for airflow, then alternate greens and browns. Chop or shred larger items to speed decomposition.
Maintain moisture similar to a wrung-out sponge: damp but not dripping.
Maintaining Your Home Composting System
Management is mostly about turning, moisture, and monitoring smell and temperature. Regular attention keeps the process active and fast.
Turning and Aeration
Turning introduces oxygen that supports aerobic microbes. For piles, turn every 1–2 weeks. Tumblers can be rotated several times a week for faster results.
If using a worm bin, avoid frequent turning—worms process the material without much disturbance.
Moisture and Temperature
Keep the pile moist like a wrung-out sponge. Add water during dry spells and add dry browns if it becomes soggy.
Hot composting reaches 55–65°C (131–149°F) and breaks down material quickly. Cold composting is slower but still effective and requires less attention.
Troubleshooting Common Problems
Most issues are fixable with simple adjustments. Here are common signs and solutions.
- Bad smell: Add browns and increase aeration; unpleasant odors often mean too much moisture or too many greens.
- Slow decomposition: Chop materials into smaller pieces, add greens if pile is too dry or browns-heavy, and increase turning.
- Pests: Use sealed bins, bury fresh food under browns, and avoid meat/dairy. For vermicompost, maintain cooler temperatures and balanced feed.
Harvesting and Using Compost
Finished compost is dark, crumbly, and smells earthy. Screen or sift larger pieces and return coarse material to the pile to finish decomposing.
Use finished compost as a top-dressing, soil amendment, or potting mix component. Typical application rates are 1–3 inches as a soil top layer or mixed into garden beds at 10–20% of total volume.
Composting can reduce household waste by up to 30 percent and increases soil water retention, which helps plants survive dry periods.
Small Case Study: Sarah’s Balcony Vermicompost
Sarah lives in a two-bedroom apartment and started a worm bin on her balcony. She collected fruit and vegetable scraps in a small counter caddy and added shredded paper as browns.
Within six months she produced about 30 liters of vermicompost. She mixed it into houseplant potting soil and reported healthier plants and fewer fertilizer purchases.
Key takeaways: regular feedings, balanced bedding, and avoiding citrus in large amounts kept the worms active and healthy.
Quick Checklist to Start Home Composting
- Choose method: pile, tumbler, or worm bin.
- Select a location with partial shade and access to soil if possible.
- Gather browns and greens; aim for 3:1 browns to greens.
- Maintain moisture, aeration, and occasional turning.
- Harvest finished compost and apply to garden or pots.
With a little planning and consistent care, home composting is a low-cost, high-impact way to reduce waste and improve soil health. Start small, observe the process, and adjust layers and moisture until your system runs smoothly.