

Start With the Basics of Home Composting
Composting turns kitchen and yard waste into a useful soil amendment. You don’t need special skills or expensive equipment to begin.
This guide focuses on practical steps you can follow this week to set up a working compost system at home. Each step uses common materials and easy maintenance routines.
Why Home Composting Matters
Home composting reduces household waste and returns nutrients to your garden. It lowers methane emissions that would result from organic waste in landfills.
Compost improves soil structure, retains moisture, and supports beneficial microorganisms. Even small households can produce enough compost for potted plants and garden beds.
How to Start Home Composting: Step-by-Step
Follow these steps to set up and maintain a compost pile or bin. Keep tasks simple so composting becomes a regular habit.
1. Choose a Location and System for Home Composting
Select a level, well-drained spot with partial shade near your kitchen or garden. Accessibility encourages regular use and turning.
- Open pile: cheapest, works for larger yards.
- Bin or tumbler: neater and faster decomposition.
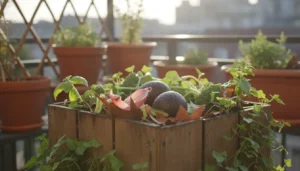
- Bokashi or worm bin (vermicompost): good for small spaces and kitchens.
2. Gather Materials: Browns and Greens
Balance carbon-rich browns and nitrogen-rich greens. A good ratio is roughly 3 parts browns to 1 part greens by volume.
- Greens: fruit and vegetable scraps, fresh grass clippings, coffee grounds.
- Browns: dry leaves, shredded paper, straw, cardboard pieces.
3. Build the Pile and Maintain It
Start with a layer of coarse browns for airflow, then add alternating layers of greens and browns. Keep the pile moist like a wrung-out sponge.
Turn the pile every 1–2 weeks with a pitchfork or use a rotating tumbler to speed up decomposition. Regular turning adds oxygen and reduces odors.
Choosing a Compost System for Home Composting
Match the system to space, budget, and waste volume. Each option has pros and cons depending on your needs.
- Open heap: minimal cost, needs space, slower breakdown.
- Bin: tidy, keeps pests out, moderate speed.
- Tumbler: fast and neat, more costly, limited capacity.
- Vermicompost (worm bin): excellent for kitchens, produces nutrient-rich castings, requires temperature control.
Troubleshooting Home Composting Problems
Common issues are easy to fix with small adjustments. Use simple checks to diagnose the pile’s condition.
Bad Smell
Cause: Too many greens or poor aeration. Fix: Add more browns and turn the pile to reintroduce oxygen.
Pile Too Dry or Too Wet
If dry, add water and some greens. If soggy, mix in dry browns and increase turning to improve drainage and airflow.
Slow Decomposition
Cause: Low surface area, large pieces, or low temperature. Fix: Chop materials into smaller pieces, increase turning, or add a compost starter (finished compost or garden soil).
Practical Tips for Successful Home Composting
- Chop or shred scraps to speed decomposition.
- Keep a small kitchen caddy with a tight lid for scraps to reduce trips and odors.
- Use finished compost as top dressing, potting mix amendment, or to improve planting holes.
- Avoid meat, dairy, diseased plants, and oily foods in backyard systems to reduce pests.
Composting can reduce household waste by up to 30 percent and can cut methane emissions from landfills. A well-managed backyard pile reaches 120–160°F, killing many weed seeds and pathogens.
Small Real-World Case Study
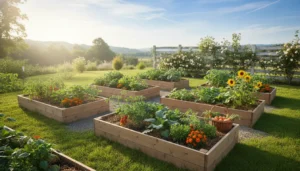
Case Study: The Rivera Family started a 60-gallon compost bin in their yard. They saved kitchen scraps in a countertop caddy and added leaves from their street tree in autumn.
Within six months they had dark, crumbly compost that improved water retention in their vegetable beds. They report fewer watering needs and healthier tomato plants the next season.
How to Know When Compost Is Ready
Finished compost looks dark, crumbly, and smells earthy. Most materials break down in 3–6 months with regular turning, or 6–12 months for an untreated slow pile.
Screen compost if you need finer material. Coarse bits can return to the pile for further decomposition.
Quick Start Checklist for Home Composting
- Choose a location and system this weekend.
- Collect a small supply of browns (dry leaves, shredded paper).
- Begin adding alternating layers of greens and browns.
- Monitor moisture and turn the pile every 1–2 weeks.
- Harvest finished compost when it is dark and crumbly.
Home composting is a low-cost, scalable way to reduce waste and improve soil. Start small, keep the routine simple, and adjust based on your results. With a little attention you can turn household scraps into a valuable resource for your garden.