
What Is Home Composting?
Home composting is the controlled decomposition of organic kitchen and garden waste into nutrient-rich soil. It turns scraps like vegetable peels and yard trimmings into material you can use to improve garden soil.
Composting reduces landfill waste, lowers methane emissions, and returns nutrients to the soil. For beginners, it is accessible with simple tools and basic routines.
How to Start Home Composting
Starting home composting requires choosing a method, collecting materials, and maintaining the pile or bin. The two common methods are bin composting and a simple compost pile.
Follow these steps to get started quickly and effectively.
Step 1: Choose a Compost System
Pick a compost bin or area based on space and convenience. Options include a closed tumbler, a plastic bin, a wooden bin, or an open heap in the garden.
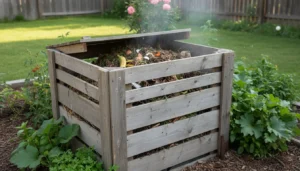
Closed bins reduce pests and look tidy, while open piles are cheap and easy to expand.
Step 2: Collect and Balance Materials for Home Composting
Compost needs a balance of green and brown materials. Greens provide nitrogen and include kitchen scraps, coffee grounds, and fresh grass clippings.
Browns provide carbon and include dry leaves, straw, cardboard, and shredded paper. Aim for roughly a 2:1 or 3:1 ratio of browns to greens by volume.
Step 3: Layering and Aeration

Start with a layer of coarse material for airflow, then alternate greens and browns. Keep layers thin so microbes can work efficiently through the pile.
Turn or aerate the pile every 1–2 weeks to supply oxygen. For tumblers, rotate handles per instructions.
Maintenance Tips for Successful Home Composting
Consistent maintenance keeps the composting process active and odor-free. Monitor moisture, temperature, and particle size.
- Moisture: The pile should feel like a wrung-out sponge. Add water if dry, or more browns if too wet.
- Temperature: Active piles heat to 120–160°F (49–71°C). This kills many weed seeds and pathogens. If the pile cools, add greens and turn it.
- Particle Size: Chop or shred materials to speed decomposition.
What to Add and What to Avoid
Good additions: fruit and vegetable scraps, coffee grounds, eggshells, yard trimmings, shredded paper, and cardboard. These accelerate microbial activity and provide nutrients.
Avoid meat, dairy, fats, diseased plants, and pet waste to prevent odors, pests, and health risks.
Common Mistakes in Home Composting
Beginners often make predictable errors that slow composting or cause issues. Recognizing these will save time and effort.
- Too wet: Causes a slimy, smelly pile. Remedy with more browns and turning.
- Too dry: Decomposition stalls. Add water and green materials.
- Incorrect balance: Too many greens create odor; too many browns slow the process.
- Not turning: Without aeration, anaerobic bacteria create bad smells.
Compost can reduce household waste by up to 30 percent, and finished compost can improve soil structure, water retention, and nutrient content.
How Long Does Home Composting Take?
Time to finished compost depends on method and management. Active, hot composting can produce usable compost in 2–3 months.
Cold composting, which is low-maintenance, can take 6–12 months. Consistent turning and a good balance of materials speed the process.
Using Finished Compost
Finished compost looks dark, crumbly, and earthy-smelling. It should not show recognizable food scraps. Use it as a top dressing, soil amendment, or potting mix component.
Incorporate 1–3 inches into garden beds or mix 10–20 percent compost into potting soil for nutrient boost and improved water retention.
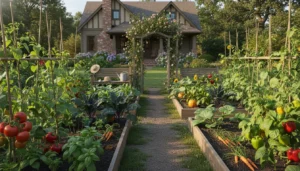
Small Case Study: A Backyard Home Composting Success
Case study: In a small suburban yard, a family of four started a 55-gallon tumbler. They collected kitchen scraps and yard leaves, targeting a 3:1 ratio of browns to greens.
Within four months of consistent turning and moisture checks, they produced about 40 liters of finished compost. Their vegetable bed yields increased noticeably the next season, and kitchen waste dropped by roughly 50 percent.
Quick Troubleshooting Guide for Home Composting
If you notice problems, follow this checklist to correct common issues fast.
- Odor: Add dry browns, turn pile, reduce greens.
- Pests: Avoid meat and dairy, secure bin, bury fresh scraps under browns.
- Slow breakdown: Chop materials, increase moisture slightly, add a handful of garden soil to introduce microbes.
Final Practical Tips for Home Composting
Start small and scale up. Use a kitchen caddy to collect scraps and empty it into the outdoor bin daily to keep odors and pests away.
Record what you add and note results. Over time, you will learn local conditions and optimize your routine for faster, odor-free composting.
Home composting converts waste into a valuable resource with minimal cost. With a balanced mix of materials, regular aeration, and simple troubleshooting, beginners can succeed and support healthier soil and gardens.