
Why Start Home Composting
Home composting turns kitchen and yard waste into nutrient-rich soil. It reduces landfill waste and improves garden health without buying expensive soil amendments.
This guide covers easy, practical steps for beginners so you can start composting today and see results within weeks to months.
Basic Principles of Home Composting
Composting is a controlled decomposition of organic material by microbes. To succeed, balance four factors: carbon, nitrogen, moisture, and aeration.
- Carbon (browns): dry leaves, cardboard, straw.
- Nitrogen (greens): vegetable scraps, coffee grounds, fresh grass clippings.
- Moisture: as damp as a wrung-out sponge.
- Aeration: oxygen keeps microbes active and prevents odors.
How to Start Home Composting: Setup and Materials
Choose a bin or build a pile. For most beginners, a simple tumbling bin or stationary compost bin works well.
Gather the following starter materials:
- Brown materials: shredded paper, dry leaves, twigs.
- Green materials: fruit and vegetable scraps, tea bags, coffee grounds.
- Basic tools: pitchfork or turning tool, watering can, thermometer (optional).
Choosing a Location
Select a spot with partial shade and good drainage. Close proximity to your kitchen encourages regular use.
Place bins on bare soil if possible to allow worms and beneficial organisms to enter the pile.
Layering Method for Beginners
Start with a coarse brown layer to improve airflow. Alternate green and brown layers as you add materials.
- Base: twigs or bulky browns for drainage.
- Add greens (kitchen scraps) then cover with browns.
- Keep layers no thicker than 6 inches each.
Home Composting Methods
Pick a method that matches your time and space. Three common approaches are cold composting, hot composting, and vermicomposting.
Cold Composting
Cold composting is low maintenance. Add wastes over time and let them break down slowly. It can take 6–12 months but needs little turning.
Hot Composting
Hot composting requires more attention but produces finished compost in weeks. Build a pile with a good carbon to nitrogen ratio (about 25–30:1) and turn every few days.
Vermicomposting
Vermicomposting uses worms to process kitchen scraps in an indoor or outdoor bin. It is ideal for small spaces and produces high-quality castings quickly.
Common Problems and Troubleshooting
Most issues come from imbalance or moisture problems. Here are quick fixes for common problems.
- Bad smells: add more browns and turn the pile to increase oxygen.
- Too dry: add water and green materials; mix thoroughly.
- Too wet and slimy: add dry browns and improve drainage or turn to aerate.
- Pests: avoid meat and oily foods; use a closed bin or cover fresh food with browns.
Timeline and What to Expect
Compost timelines vary by method and conditions. Expect hot systems to finish in 4–12 weeks and cold piles to take 6–12 months.
Finished compost is dark, crumbly, and smells earthy. Screen larger pieces to return slow-decomposers to the pile.
Practical Tips to Improve Home Composting
- Chop kitchen scraps to speed decomposition.
- Keep a small indoor bin and empty it regularly into the outdoor bin.
- Mix in garden soil occasionally to introduce microbes.
- Monitor moisture and add water or dry material as needed.
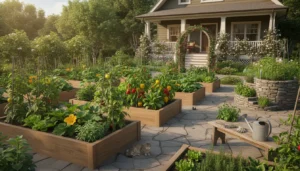
Small Real World Example Case Study
Case: Two-person household with a small garden. They used a 60‑liter tumbling bin and followed a simple routine: collect kitchen scraps in a countertop pail, add scraps to the bin daily, and add a handful of shredded cardboard every third day.
Results: Within 10 weeks they had usable compost for potted herbs. Turning twice weekly and keeping moisture consistent avoided odors and pests.
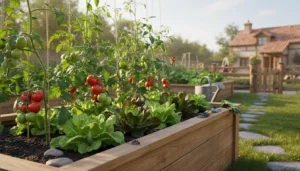
How to Use Your Finished Home Composting Product
Use finished compost as a top dressing, mixed into potting soil, or worked into garden beds. It improves soil structure and plant nutrition.
Application rates: mix 10–20% compost into potting mixes or apply 1–2 inches as mulch around plants.
Checklist to Start Home Composting Today
- Choose a bin or pile location.
- Gather brown and green materials.
- Set up a small indoor pail for kitchen scraps.
- Follow layering and monitoring tips and start adding waste.
- Turn, check moisture, and be patient.
Home composting is accessible and scalable. Start small, learn from the process, and adjust based on your space and goals. With regular attention you’ll convert waste into a useful resource for your garden.