
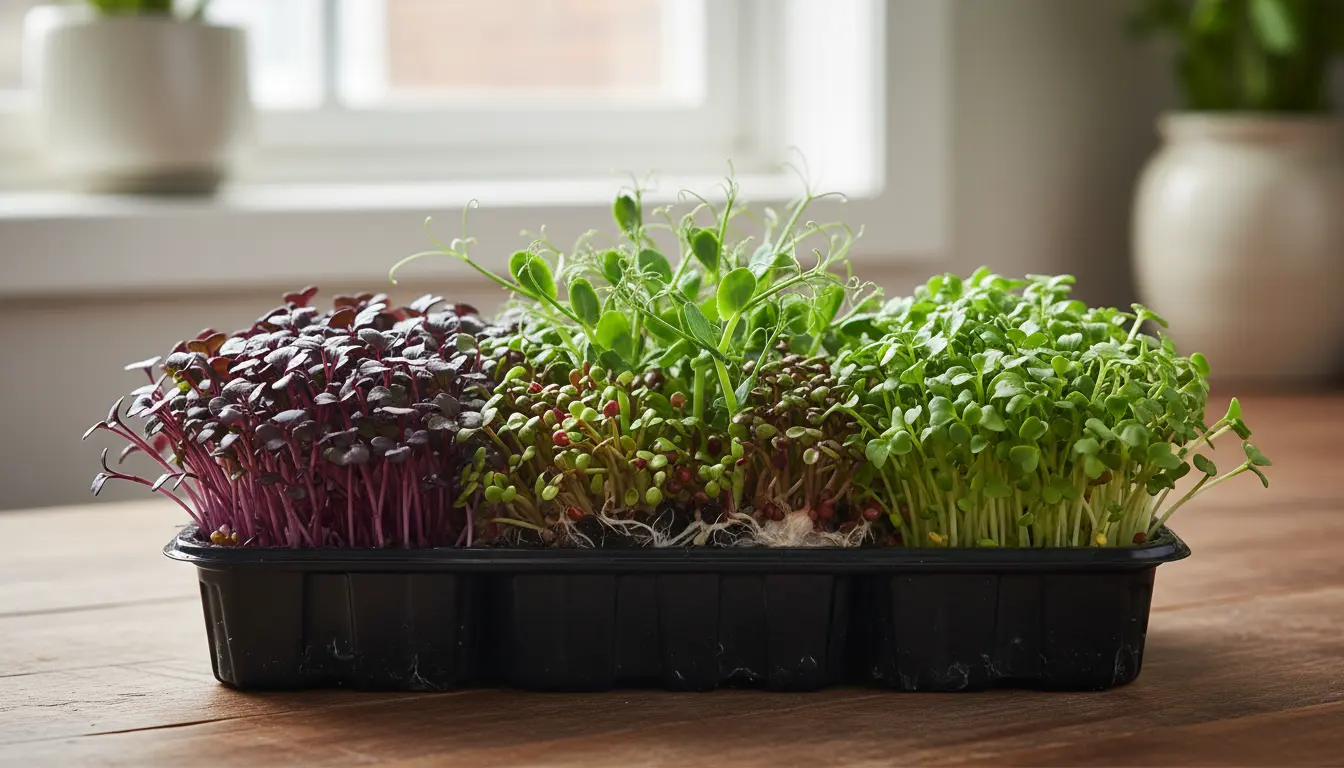
Microgreens are young vegetable and herb seedlings harvested after their first leaves form. They are nutrient-dense, fast to grow, and work well in small spaces. This guide explains how to grow microgreens at home with practical, step-by-step instructions.
Why Grow Microgreens at Home
Growing microgreens at home gives you fresh greens year-round without a garden. They mature in 7–21 days, so you see quick results and minimal maintenance.
Microgreens also let you try different flavors like spicy radish, mild basil, or nutty sunflower in small batches. They are ideal for kitchens, balconies, or small apartments.
Essential Supplies to Grow Microgreens at Home
You only need a few basic items to start. Most supplies are affordable and reusable for multiple harvests.
Seeds and Growing Medium
- Choose seeds labeled for microgreens or salad mixes. Popular seeds: sunflower, pea, radish, broccoli, and basil.
- Use seed-starting mix, coconut coir, or a thin layer of potting soil. Paper towels or specially made growing mats also work.
Containers and Light
- Shallow trays or recycled food containers (1–2 inch depth) are ideal. Ensure drainage or use a small amount of water in a tray under the container.
- Natural sunlight works well near a south- or west-facing window. Add a small LED grow light if light is limited.
Watering and Tools
- A spray bottle gives gentle, even moisture. Overwatering can cause mold, so mist rather than pour.
- Scissors, a fine-mesh sieve for rinsing seeds, and a thermometer (optional) help maintain consistent conditions.
Step-by-Step: How to Grow Microgreens at Home
Follow these steps to grow microgreens at home. The process is simple and repeatable.
-
Prepare the tray.
Fill your tray with 1/2 to 1 inch of growing medium and level the surface. Lightly moisten the medium before sowing.
-
Sow seeds.
Scatter seeds evenly across the surface. For denser varieties like microgreen mixes, aim for uniform coverage but avoid piling seeds.
-
Cover seeds.
Press seeds gently into the medium. Cover with a thin layer of soil or another tray to create humidity for germination.
-
Maintain humidity and light.
Keep trays in a warm spot (65–75°F). After 2–4 days, remove the cover and move trays to bright, indirect light or under LED lights.
-
Water carefully.
Mist twice daily or when the surface feels dry. Water from the bottom only if your trays allow it to prevent disturbing seeds.
-
Harvest.
Harvest when the first true leaves appear, typically 7–21 days depending on the variety. Cut with clean scissors just above the soil line.
Basic Routine for Best Results
- Check moisture daily and mist as needed.
- Rotate trays to ensure even light exposure.
- Keep tools and trays clean to reduce disease risk.
Microgreens can contain up to 40 times more nutrients per weight compared with mature plants for some vitamins and antioxidants.
Troubleshooting When You Grow Microgreens at Home
Common issues are easy to fix with small adjustments. Identifying the problem quickly saves a crop.
Mold and Damping Off
- Cause: Overly wet conditions and poor airflow.
- Fix: Reduce humidity, space trays for air circulation, and avoid waterlogging the medium.
Leggy or Pale Microgreens
- Cause: Insufficient light during growth.
- Fix: Move to brighter location or use an LED grow light for 12–16 hours daily.
Poor Germination
- Cause: Old seeds, uneven soil contact, or wrong temperature.
- Fix: Use fresh seeds, press seeds gently into the medium, and keep trays warm during germination.
Small Case Study: A Home Kitchen to Cafe Supply
Anna, a home cook in Portland, started growing microgreens at home to top her salads and sandwiches. She used two 10×5 trays on a sunny windowsill and an inexpensive LED light.
Within two months she consistently harvested basil and radish microgreens twice a week. Her local coffee shop bought small clamshell batches for garnish, giving her a modest side income and reducing food waste.
Key takeaways: start small, keep consistent routines, and test local demand if you plan to sell.
Quick Tips to Grow Microgreens at Home Successfully
- Start with easy seeds: radish, sunflower, and broccoli.
- Use trays with drainage and avoid overcrowding seeds.
- Label trays with seed type and sow date for tracking.
- Rotate crops to learn timing and refine your routine.
Growing microgreens at home is a low-cost, high-reward activity for cooks and small-space gardeners. With a few trays, seeds, and consistent care, you can harvest nutritive greens in just a week or two. Try a small batch today and refine your process as you go.