
Why a rainwater harvesting system matters
Collecting rainwater reduces reliance on municipal water for irrigation, washing, and non-potable uses. It lowers water bills and helps during dry spells while reducing stormwater runoff.
This guide walks you through how to build a rainwater harvesting system that is practical, low-cost, and scalable for most homes.
Key components of a rainwater harvesting system
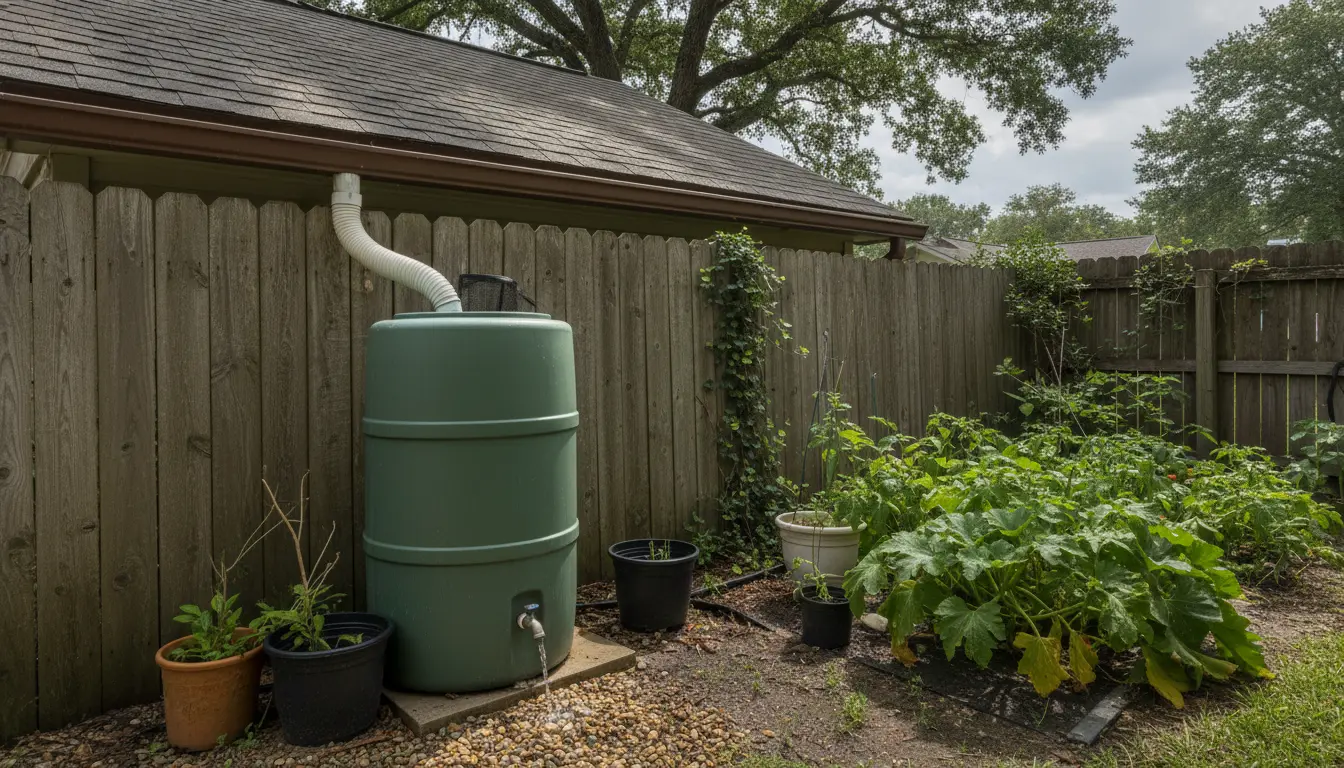
A functioning rainwater harvesting system includes a roof catchment, conveyance (gutters and downspouts), first-flush diverter, filter, storage tank, and distribution. Each element affects water quality and system longevity.
- Roof catchment: Typically your existing roof surface (metal roofs are best for water quality).
- Gutters and downspouts: Direct water to the storage tank with minimal leakage.
- First-flush diverter: Keeps debris and the first wash of roof contaminants out of storage.
- Filters and screens: Remove leaves, large debris, and insects before water enters the tank.
- Storage tank: Above- or below-ground cisterns, barrels, or totes sized to your needs.
- Distribution: Gravity-fed spigots, pump systems, or irrigation hookups for use.
How to size a rainwater harvesting system
System size depends on roof area, average rainfall, and intended water uses. Use a simple calculation to estimate potential collection.
Collection estimate = Roof area (sq ft) × Rainfall (inches) × 0.623. The factor 0.623 converts inches on a square foot to gallons.
- Example: 1,000 sq ft roof × 1 inch of rain × 0.623 = 623 gallons per inch of rain.
- Decide whether you need capacity for seasonal storage or just short-term capture for gardens.
Step-by-step: How to build a rainwater harvesting system
1. Inspect and prepare the roof and gutters
Start by inspecting your roof for debris and contaminants. Clean or replace gutters, and ensure downspouts are solidly attached.
Install gutter guards to reduce leaves and large debris entering the system.
2. Install a downspout diverter and first-flush system
Fit a downspout diverter to route flow to the storage tank. Add a first-flush diverter to discard the initial runoff, which often contains dirt and bird droppings.

First-flush units can be simple diverter pipes with a removable plug or purpose-built assemblies.
3. Add pre-filtration and screens
Place a leaf screen at the top of the tank inlet and add a fine sediment filter if you plan to use water for delicate plants. Mesh screens of 1–2 mm keep insects and debris out.
4. Choose and position the storage tank
Decide between above-ground barrels or larger cisterns. Ensure the base is level and strong enough to hold the full weight. A 500-gallon tank filled with water can weigh over 4,000 pounds, so use a reinforced base or concrete pad.
For gravity-fed distribution, place tanks on a raised platform.
5. Connect and seal fittings
Use appropriate fittings and silicone or plumber’s tape to avoid leaks. Install an overflow outlet directed away from foundations and a bottom outlet with a spigot or pump connection for water use.
6. Optional: Pump and treatment for potable uses
If using rainwater for drinking or household use, add filtration (carbon, UV) and a certified treatment system. Most DIY systems are intended for non-potable uses unless professionally treated.
Maintenance and winter care
Regular maintenance preserves water quality and equipment life. Clean gutters and screens seasonally and inspect tanks for algae or sediment buildup.
In cold climates, drain exposed piping and insulate or relocate tanks to prevent freezing. Use antifreeze measures only where compatible with intended water use.
Costs and materials checklist
Costs vary by capacity and materials chosen. A basic rain barrel setup can be under $200, while larger cistern systems with pumps and filtration reach several thousand dollars.
- Gutters and downspout diverter
- First-flush diverter
- Leaf screen and filters
- Storage tank or rain barrels
- Pump or spigot and plumbing fittings
- Concrete pad or supporting platform
One inch of rain on a 1,000 sq ft roof can produce about 623 gallons of water. Capturing that water can significantly reduce irrigation needs during dry months.
Small real-world example
Case: A suburban homeowner with a 1,200 sq ft roof installed two 275-gallon tanks and basic filtration. After a single 2-inch storm, they collected nearly 1,500 gallons. They now use this water for a vegetable garden and outdoor washing, cutting summer water bills by about 30%.
The project cost was approximately $1,800 including a used pump and custom platform, paid back in reduced utility bills and lower municipal demand over several years.
Best practices and safety tips
- Use food-grade tanks if there is any chance of potable use later.
- Screen all openings to prevent mosquito breeding.
- Keep overflow away from foundations to avoid moisture damage.
- Check local regulations and permits—some areas regulate rainwater collection.
Conclusion: Practical steps you can take next
Start small with a rain barrel and expand later. Inspect your roof and gutters, add a diverter, and position a storage tank on a safe platform. Routine maintenance will keep the system working efficiently for years.
Building a rainwater harvesting system is a cost-effective way to conserve water, reduce bills, and improve resilience during dry periods.