
Why start a home compost bin?
Starting a home compost bin turns kitchen scraps and yard waste into nutrient-rich soil. It reduces landfill waste and gives you free compost for plants and gardens.
Composting is simple and cost-effective. With basic materials and minimal effort, most households can compost successfully.
How to start a home compost bin: a simple overview
Begin by choosing a bin type and a location. Then layer materials correctly and maintain moisture and aeration for steady decomposition.
This guide covers the steps, common materials, maintenance, and troubleshooting to help you start a home compost bin with confidence.
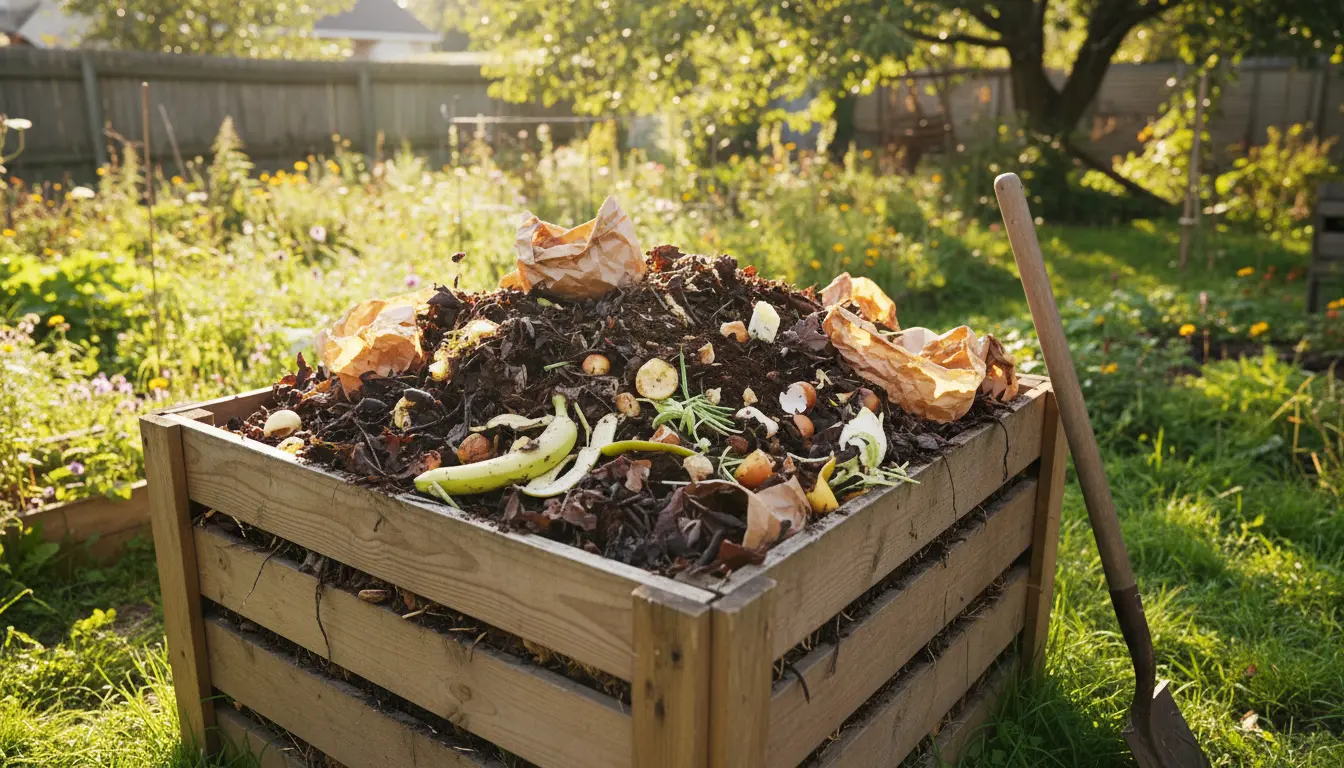
Choose the right bin
Select a compost container that fits your space and needs. Options include plastic tumblers, wooden bins, or a covered pile on the ground.
- Small gardens: a 50–100 gallon tumbler or bin works well.
- Large yards: a three-bin system or open pile is practical.
- Balconies or small patios: use a compact, ventilated compost bin or worm composting (vermicompost).
Pick a location
Place the bin on bare soil if possible to allow worms and microbes to access the pile. Choose a spot with some shade to prevent excessive drying.
Ensure the access area is convenient so you will use the bin regularly. Good placement improves participation and results.
What materials to use in a home compost bin
Compost needs a balance of carbon-rich “browns” and nitrogen-rich “greens.” Proper balance speeds decomposition and reduces odors.
Examples of browns and greens
- Greens (nitrogen): fruit and vegetable scraps, coffee grounds, fresh grass clippings.
- Browns (carbon): dry leaves, shredded paper, cardboard, straw, wood chips.
A good working ratio is roughly 2–3 parts browns to 1 part greens by volume. Adjust if the pile smells or is too dry.
Step-by-step: How to start a home compost bin
- Prepare the base: Place twigs or coarse material at the bottom for drainage and airflow.
- Layer materials: Add 2–3 inches of browns, then a thinner layer of greens. Repeat layers rather than creating a single mixed pile.
- Maintain moisture: Compost should be damp like a wrung-out sponge. Add water if dry, add more browns if soggy.
- Turn or aerate: Every 1–2 weeks, turn the pile with a fork or rotate the tumbler to add oxygen.
- Monitor temperature: A hot pile (120–160°F or 50–70°C) speeds breakdown. Cool piles still compost but more slowly.
- Harvest finished compost: After 2–6 months, dark crumbly material indicates ready compost. Use it in pots, beds, or as a soil topdress.
Tips for kitchen scraps
- Chop or blend large scraps to speed decomposition.
- Keep oily foods, meat, and dairy out of most backyard composts to avoid pests.
- Use a small indoor countertop bin with a lid to collect scraps and empty frequently.
Composting can reduce household waste by up to 30 percent. Microorganisms and worms rapidly convert organic matter into soil amendment when given the right mix of carbon, nitrogen, moisture, and air.
Maintenance and troubleshooting for your home compost bin
Simple checks keep a compost bin healthy: smell, moisture, and activity. Address issues early for consistent results.
Common problems and fixes
- Smelly bin: Add more browns and turn the pile to introduce air.
- Slow decomposition: Chop materials finer, increase greens slightly, and ensure adequate moisture and warmth.
- Pests: Avoid adding meat and large amounts of oily food; use a closed bin or bury scraps within the pile.
- Too dry: Water the pile and cover it during dry spells to retain moisture.
Small real-world example: A city household case study
Example: A two-person apartment household started a 50-gallon tumbler on a small balcony. They combined kitchen scraps with shredded paper and dry leaves from a nearby park.
After two months of turning the tumbler weekly and monitoring moisture, they produced usable compost that improved their container garden soil. Their weekly trash volume decreased noticeably.
Using finished compost
Finished compost can be mixed into garden beds, used as potting mix amendment, or applied as a mulch. It improves soil structure, water retention, and nutrient availability.
Apply a 1–2 inch layer of compost as a topdressing or mix 10–20 percent compost into potting soil for containers.
Final checklist to start a home compost bin
- Choose a bin type and convenient location.
- Collect greens and browns separately for easy layering.
- Keep the pile moist and aerated; turn regularly.
- Monitor for pests and odors and adjust balance as needed.
- Harvest and use finished compost in your garden or pots.
Starting a home compost bin is a practical step toward reducing waste and improving plant health. With a simple routine and basic balance of materials, you can create rich compost at home.