
Why replace a bathroom faucet
A worn or leaking faucet wastes water and can damage cabinets. Replacing a bathroom faucet improves function and updates the sink area.
This guide explains how to replace a bathroom faucet safely and efficiently. It uses simple steps and common tools you can find at most hardware stores.
Tools and materials to replace a bathroom faucet
Gather tools before you start to avoid interruptions. Below is a basic checklist for most single- or three-hole bathroom sinks.
- Adjustable wrench and basin wrench
- Phillips and flathead screwdrivers
- Plumber’s putty or silicone sealant
- Teflon tape
- Bucket and rags
- New faucet with mounting hardware and supply lines
- Flashlight or headlamp
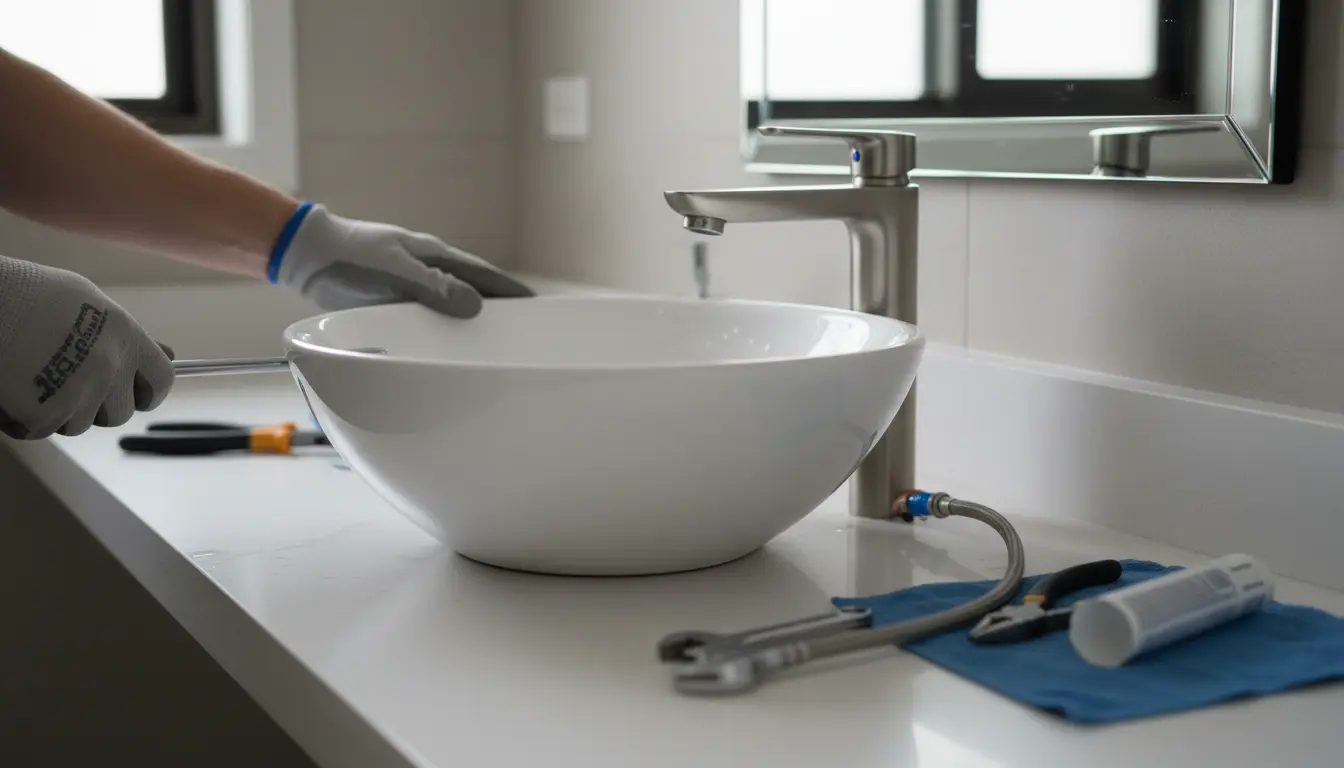
How to replace a bathroom faucet: Step-by-step
Follow these steps in order and take your time under the sink. If you encounter corroded parts, work slowly to avoid breaking fittings.
Step 1: Turn off water and prepare the area
Locate the shutoff valves under the sink and turn them clockwise to close. If the valves do not work, shut off the main water supply for the house.
Open the faucet to drain remaining water. Place a bucket under the P-trap to catch drips and lay down rags to protect the cabinet surface.
Step 2: Disconnect water supply lines
Use an adjustable wrench to loosen the nuts on the supply lines where they meet the faucet. Hold the valve stem with another wrench to avoid twisting it.
Remove the supply lines and let any trapped water drain into the bucket. Inspect the lines for damage and replace them if they are old or stiff.
Step 3: Remove the old faucet
Find the mounting nuts securing the faucet to the sink. A basin wrench is often needed for tight spaces behind the sink basin.
Loosen and remove the mounting hardware, then lift the faucet out from above. Clean the sink surface of old putty and mineral deposits.
Step 4: Prepare and position the new faucet
Apply plumber’s putty or a thin bead of silicone sealant around the faucet base if the manufacturer recommends it. Some faucets include a rubber gasket instead.
Feed the faucet’s supply lines and mounting studs through the sink holes and position the faucet squarely. From under the sink, hand-thread the mounting nuts and tighten evenly.
Step 5: Reconnect supply lines and test
Wrap Teflon tape on threaded connections if required, then attach supply lines to the valve stems. Tighten the nuts until snug—do not overtighten plastic fittings.
Turn the water back on slowly and check for leaks. Open the faucet and let water run to clear any debris from the lines. Inspect all connections and tighten if necessary.
Common problems when you replace a bathroom faucet
Replacing a bathroom faucet can reveal old, corroded parts or misaligned holes. Expect a few hiccups and keep these tips in mind.
- Stiff shutoff valves: Use penetrating oil and allow it to soak before attempting to turn the valve.
- Mineral buildup: Clean surfaces with vinegar and a plastic scraper to avoid scratches.
- Misaligned holes: Use the correct faucet type for your sink (single, centerset, or widespread).
Did You Know?
Did You Know? A leaky bathroom faucet that drips once per second can waste over 3,000 gallons of water per year. Replacing a faulty faucet can reduce water waste and lower your utility bill.
Real-world example: Quick case study
A homeowner in Denver replaced a leaky centerset faucet in 90 minutes. The old faucet had a constant drip and mineral buildup around the base.
After shutting off the valves, they removed the old faucet, cleaned the sink, and installed a new low-flow faucet with flexible supply lines. The job cost under $150 in parts and eliminated the drip. The homeowner reported a noticeably quieter sink and no leaks after a week of use.
Tips for a successful faucet replacement
- Match the faucet to your sink configuration before buying. Check hole count and spacing.
- Buy new supply lines if the old ones are stiff or older than 10 years.
- Work with good lighting and a mirror if under-sink access is limited.
- Keep small parts like screws and gaskets together in a container during the job.
When to call a professional
If plumbing connections are corroded, the sink or countertop needs modification, or you are uncomfortable turning off the main water supply, call a licensed plumber. Professional help ensures correct installation and avoids water damage.
For complex projects, a plumber can also verify water pressure, install shutoff valves, or adjust drain alignment to match the new faucet.
Final checklist after you replace a bathroom faucet
- Check for leaks for at least 24 hours after installation.
- Confirm hot and cold water orientation is correct.
- Clean excess sealant and test handle smoothness.
- Dispose of old parts and leftover materials responsibly.
Replacing a bathroom faucet is a manageable DIY task for most homeowners. With the right tools, careful steps, and a bit of patience, you can complete the job in an afternoon and improve both function and appearance of your bathroom sink.