
Why home composting matters
Home composting turns kitchen and yard waste into a useful soil amendment. It reduces landfill waste, lowers greenhouse gas emissions, and feeds plants in a natural way.
For beginners, the process may seem technical, but simple systems work well for most households. This guide gives clear, actionable steps to start composting at home.
What is home composting
Composting is the biological breakdown of organic materials by microbes, worms, and fungi. The result is dark, crumbly compost that improves soil structure and nutrient content.
There are several methods—hot composting, cold composting, vermicomposting—but all follow basic principles of balance, aeration, moisture, and time.
Composting a ton of food scraps can prevent roughly 1,000 pounds of carbon dioxide equivalent from entering the atmosphere.
What you can and cannot compost
Knowing what materials to add keeps the pile healthy and minimizes pests. Use a mix of carbon rich and nitrogen rich items to keep microbes active.
Good materials to compost
- Green items: vegetable scraps, fruit peels, coffee grounds, grass clippings
- Brown items: dried leaves, shredded paper, cardboard, straw
- Small amounts of plant trimmings and dead flowers
Materials to avoid
- Meat, dairy, oils, and fatty foods (they attract pests)
- Diseased plant material and invasive weeds with seeds
- Pet waste from carnivores and treated wood
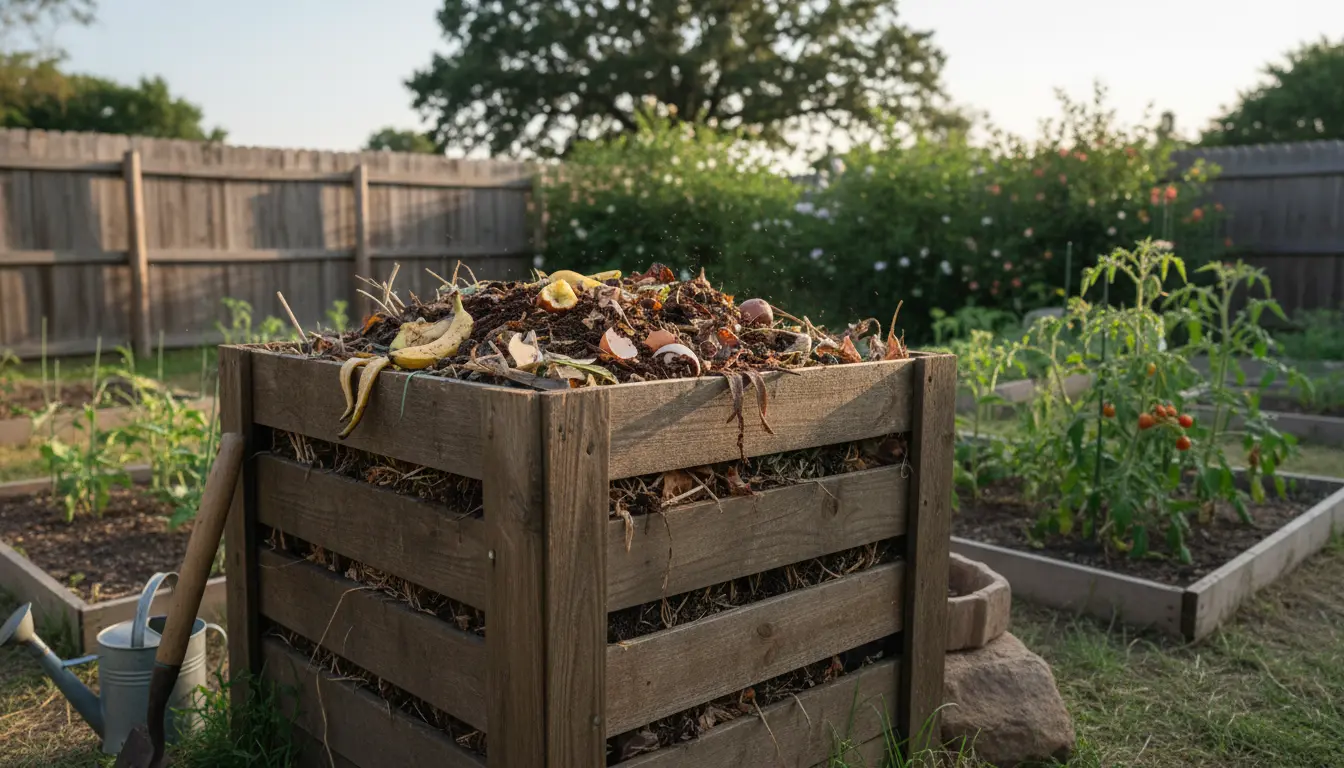
How to start a basic home compost bin
You can start with a simple bin or pile in the garden or use a tumbling composter. The goal is a contained area that retains heat and moisture while allowing air in.
Steps to build a simple bin
- Choose a shady, level spot near water for easy access.
- Place a container: a commercial bin, wooden pallet cage, or a plastic bin with holes for aeration.
- Layer materials: start with coarse browns for drainage, then alternate greens and browns.
- Keep the pile moist like a wrung-out sponge; add water if dry or cover if too wet.
- Turn the pile every 1–2 weeks to add oxygen and speed decomposition.
For hot composting, aim for a pile at least 3 feet wide and 3 feet tall so it retains heat. Cold composting requires less turning but takes longer.
Troubleshooting common problems
Problems are usually caused by imbalanced materials, poor aeration, or incorrect moisture. Check these key factors when compost goes wrong.
My compost smells bad
Bad odors mean too much nitrogen or lack of oxygen. Add bulky brown materials like dried leaves and turn the pile to reintroduce air.
Compost is too dry or too wet
If it is dry and not decomposing, add water and more green materials. If it is soggy and smells, mix in dry browns and improve drainage.
Not heating up
The pile may be too small or lack nitrogen. Increase the size, add fresh greens, and turn it to introduce air.
Vermicomposting option for small spaces
Vermicomposting uses worms to process food scraps quickly in indoor bins. It is ideal for apartments or people who want a compact system.
Use red wiggler worms, keep bedding moist, and feed small amounts of food waste. Harvest worm castings every few months for potting mixes.
How to use finished compost
Finished compost is dark, crumbly, and earthy-smelling. Use it as a soil amendment, top dressing, or mix into potting soil to boost plant health.
- Mix 10–20% compost into garden beds before planting.
- Top dress around trees and shrubs with a 1–2 inch layer.
- Blend compost with potting soil for container plants.
Simple tools and supplies to get started
You do not need expensive equipment to compost. A few basic tools make the work easier and cleaner.
- Pitchfork or turning tool
- Shredder or scissors for chopping large items
- Garden thermometer for hot composting (optional)
- Bin or tumbler to contain the pile
Real-world example: A small suburban household
Case study: A family of four started a 3×3 foot bin in their backyard. They saved fruit and vegetable scraps, coffee grounds, and yard waste in a kitchen caddy.
By alternating layers of greens and browns and turning the pile every week, they produced usable compost in five months. They used the compost to top-dress their vegetable beds, which improved tomato yields the next season.
Quick checklist before you begin home composting
- Pick a bin type and location
- Collect kitchen scraps in a lidded container
- Gather dry brown materials like leaves or shredded paper
- Maintain moisture and turn regularly
- Be patient — composting takes weeks to months depending on method
Final tips for success with home composting
Start small and learn by doing. Keep a balanced mix of browns and greens, manage moisture, and turn the pile when possible.
Composting is a practical, low-cost way to reduce waste and improve garden health. With simple habits, most households can produce useful compost year-round.