
Home Composting Basics
Home composting turns kitchen and yard waste into rich soil amendment. It reduces waste that would otherwise go to a landfill and improves garden health.
This guide explains simple, practical steps to start and maintain a compost bin at home. No specialist tools are required.
Why Choose Home Composting
Composting reduces garbage collection volume and greenhouse gas emissions from landfills. It also returns nutrients to the soil and improves water retention.
For beginners, home composting is affordable, scalable, and can be adapted to small urban spaces or larger yards.
Key Benefits of Home Composting
- Reduces household waste by up to 30–50 percent.
- Produces free, nutrient-rich compost for gardens and potted plants.
- Improves soil structure and plant health.
What You Need to Get Started
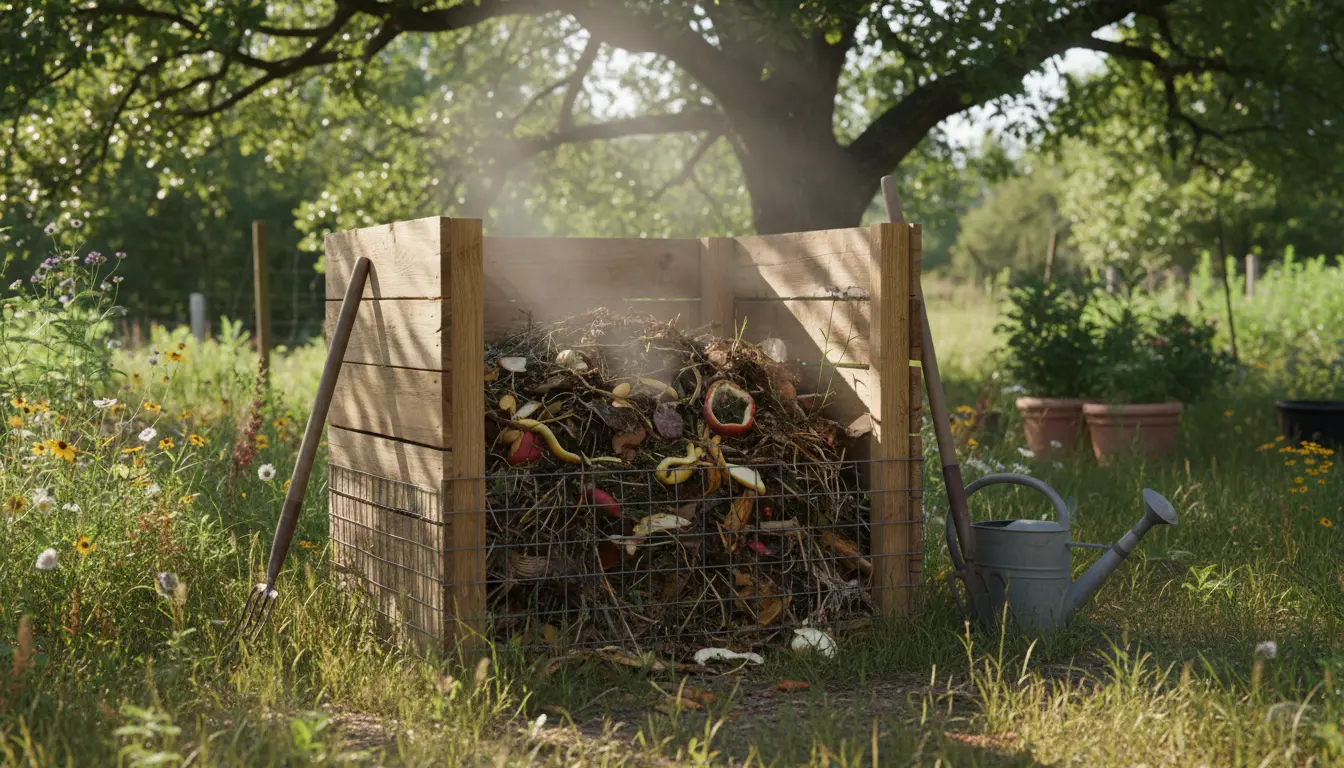
Starting a basic compost system requires just a few items. You can use a commercial bin or make one yourself from wood pallets or a plastic drum.
Keep the setup simple at first and expand later if you want faster results.
Essential Supplies
- Compost container (bin, tumbler, or DIY pile)
- Kitchen scrap container for collection
- Garden fork or pitchfork for turning
- Optional: thermometer to monitor temperature
What to Compost: Greens and Browns
Successful home composting depends on balancing nitrogen-rich “greens” and carbon-rich “browns.” This balance supports microbial activity that breaks down materials.
Keep a good mix and avoid adding problematic items.
Examples of Greens
- Fruit and vegetable scraps
- Fresh grass clippings
- Coffee grounds and tea leaves
Examples of Browns
- Dry leaves and straw
- Shredded paper and cardboard (no glossy paper)
- Small branches and wood chips
Items to Avoid
- Meat, fish, bones, and oily foods (attract pests)
- Diseased plants or invasive weeds with seeds
- Pet waste from meat-eating animals
Step-by-Step: How to Start a Simple Compost Bin
Follow these steps to create a functioning compost pile using common household materials. Each step is short and actionable.
- Choose a location. Pick a partly shaded spot with drainage. Close to the house is fine for convenient kitchen scrap drops.
- Build a base layer. Add a 4–6 inch layer of coarse browns like small branches. This improves airflow and drainage.
- Add materials in layers. Alternate thin layers of greens and browns. Aim for roughly a 2:1 or 3:1 brown-to-green volume ratio.
- Keep it moist. The pile should feel like a wrung-out sponge, damp but not dripping. Water occasionally in dry weather.
- Turn the pile. Every 1–2 weeks, turn with a fork to add oxygen and speed decomposition. Less frequent turning still works but takes longer.
- Monitor and adjust. If the pile smells, add more browns and turn. If it’s cold and inactive, add more greens or increase pile size.
Maintenance Tips for Home Composting
Routine attention keeps a compost bin healthy and productive. Small actions prevent common problems like odor, pests, or slow breakdown.
Simple Maintenance Checklist
- Turn the pile every 1–2 weeks for faster composting.
- Add shredded cardboard or dry leaves when greens pile up.
- Cover new food scraps with a brown layer to deter fruit flies.
- Check moisture weekly and water during dry spells.
Adding small amounts of finished compost to a new pile can introduce helpful microbes and speed up decomposition. A cup or two is enough for a typical backyard bin.
How Long Does Composting Take?
Time depends on method, materials, and how often you turn the pile. With regular turning and good balance, finished compost can form in 2–4 months.
Cold composting (minimal turning) can take a year or more but still produces usable compost.
Real-World Example: Small Urban Household Case Study
Case: A two-person apartment household started a 60-liter compost bin on a small balcony. They used a mix of kitchen scraps, coffee grounds, and shredded paper.
After six months of weekly turning and occasional leaf additions, they produced about 15 liters of finished compost. They used the compost in balcony pots and saw improved plant growth and reduced store-bought potting mix use.
Using Finished Compost
Finished compost is dark, crumbly, and smells earthy. Use it as a top dressing, mix into potting soil, or blend with garden beds to improve structure and nutrients.
Apply a 1–2 inch layer around plants or mix 10–20 percent by volume into potting mixes for containers.
Troubleshooting Common Problems
If the pile smells like ammonia, it has too many greens; add more browns and turn. If it’s dry and slow, add water and more greens.
Pests are usually attracted to meat or oily foods. Remove these items and add a brown cover layer to discourage animals.
Final Notes on Home Composting
Home composting is flexible. Start small, learn from the process, and scale up as you get comfortable. Consistent, simple habits produce the best results.
With a basic bin and regular attention, any household can turn waste into valuable compost and reduce its environmental footprint.