
Composting at home turns kitchen scraps and yard waste into valuable soil. This guide shows clear, practical steps for people new to composting, with simple tools and routines you can use in any space.
Why Home Composting for Beginners Is Worth Doing
Compost reduces household waste and improves garden soil. It saves money on fertilizers and lowers methane emissions from landfills.
Beginner-friendly methods fit apartments and backyards, and you can scale practices as you gain confidence. Start small and build a routine.
Basic Principles of Home Composting for Beginners
Composting is a controlled breakdown of organic material by microbes. Success depends on three things: balance, moisture, and airflow.
- Balance: Mix greens (nitrogen) and browns (carbon).
- Moisture: Keep the pile damp like a wrung-out sponge.
- Airflow: Turn or aerate the pile to supply oxygen.
What Are Greens and Browns
Greens include fruit scraps, vegetable peelings, coffee grounds, and fresh grass clippings. These add nitrogen and moisture.
Browns include dry leaves, shredded paper, straw, and cardboard. Browns add carbon and structure to the pile.
Choosing a System: Bins, Tumblers, or Piles
Pick a method based on space, budget, and effort. Each option works for beginners with simple adjustments.
Compost Bin
Plastic or wooden bins are tidy and keep pests away. They are good for small yards and require occasional turning.
Compost Tumbler
Tumblers speed up decomposition and make turning easier. They are more expensive but reduce effort and look neat.
Open Pile
Open piles are low-cost and suitable for large yards. They need more management for pests and moisture control.
Step-by-Step: How to Start Home Composting for Beginners
Follow these steps to build a compost system that works in weeks or months depending on conditions.
- Choose a container or spot with moderate sun and drainage.
- Start with a 4–6 inch base of coarse browns to allow airflow.
- Add alternating layers: one part greens to two parts browns by volume.
- Moisten each layer lightly; do not soak. The pile should feel like a damp sponge.
- Turn every 1–2 weeks with a pitchfork or by spinning a tumbler to add oxygen.
- Monitor temperature; a warm center (100–140°F) means microbes are active.
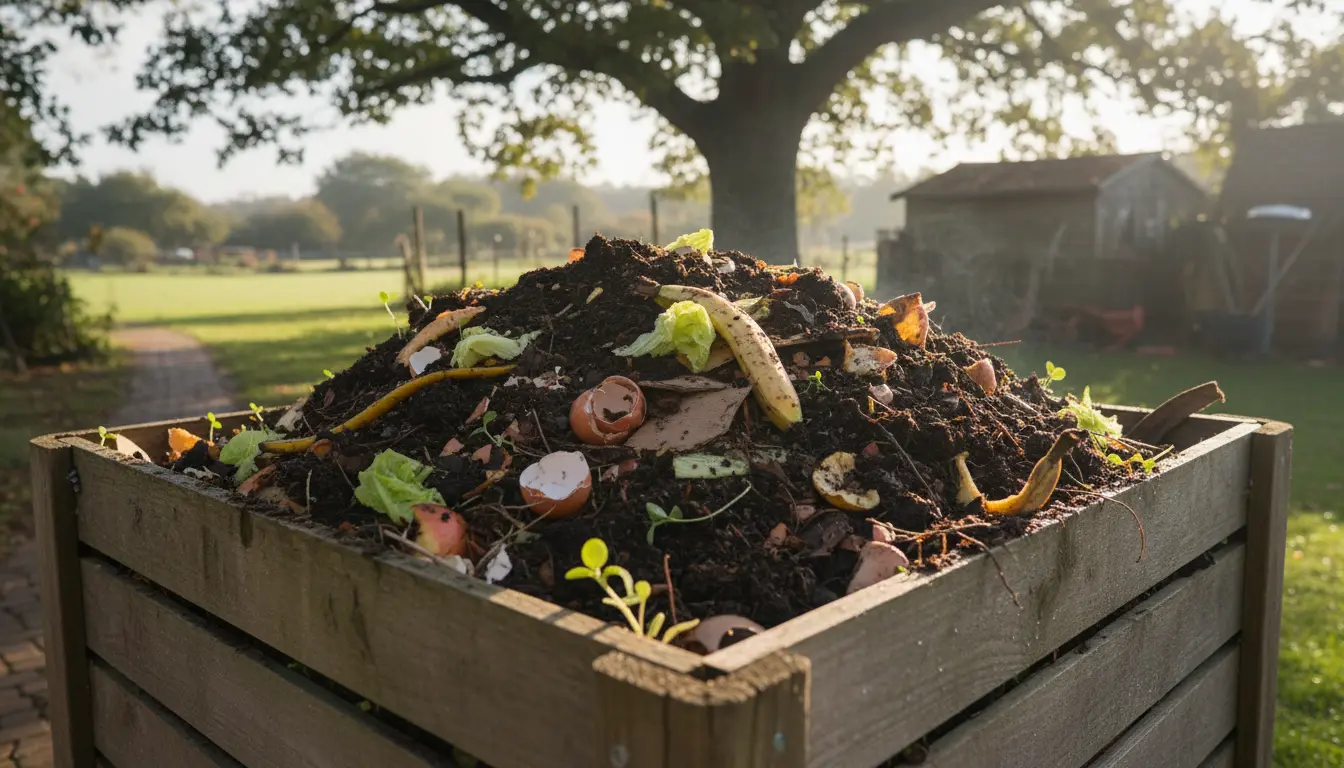
- Harvest finished compost when material is dark, crumbly, and earthy-smelling.
Practical Tips for Beginners
- Chop or shred materials to speed decomposition.
- Keep a small kitchen caddy with a lid for daily scraps to reduce trips outside.
- Layer thinly to avoid compacting the pile and blocking airflow.
- Avoid meat, dairy, and oily foods to prevent odors and pests.
Common Problems and Troubleshooting
Beginners often face odors, slow breakdown, or pests. These problems are usually easy to fix.
Smelly Compost
Bad smells usually mean too many greens or poor airflow. Add more browns and turn the pile to aerate it.
Slow Decomposition
If the pile is slow, check moisture and particle size. Add water if dry and chop materials finer.
Pests and Fruit Flies
Close the bin, bury food under browns, and avoid meat or fatty scraps. Use a sealed kitchen caddy to limit flies.
By composting household food waste you can reduce landfill waste and cut methane emissions. A typical family of four can compost about 400–600 pounds of organic waste per year.
Using Finished Compost
Finished compost enriches garden beds, improves soil structure, and helps retain moisture. Use it as a top dressing or mix into potting soil.
Aim to apply a 1–2 inch layer around vegetables and flowers each season. For potted plants, mix one part compost with three parts potting mix.
Simple Tools and Supplies for Home Composting for Beginners
- Compost bin or tumbler
- Pitchfork or aerator tool
- Kitchen caddy with a tight lid
- Pruning shears or scissors for chopping scraps
- Thermometer (optional) to track pile temperature
Real-World Example: Small Apartment Success
Case Study: Lena, a city renter, started indoor composting with a 6-liter bokashi bucket and a small outdoor tumbler. She collected fruit and vegetable scraps in the bokashi bucket and added the pre-compost to her outdoor tumbler each week.
After four months she had usable compost for balcony planters and reduced her trash by one bag per week. The bokashi method controlled odors and allowed composting without a full backyard.
Final Checklist for Home Composting for Beginners
- Pick a system that fits your space and schedule.
- Balance greens and browns and keep the pile moist.
- Turn or aerate regularly for faster results.
- Harvest and use finished compost in your garden or containers.
Home composting is a low-cost, practical habit that benefits gardens and the environment. Start with small steps, observe what works, and adjust as you gain experience.