
Start Home Composting With Simple Steps
Home composting turns kitchen scraps and yard waste into valuable soil. This guide focuses on practical actions you can take to set up and maintain a compost bin at home.
What Is Home Composting?
Home composting is a natural process that breaks down organic material into nutrient-rich compost. You can use the finished compost to improve garden soil, potting mixes, or lawn health.
Why Start Composting at Home?
Composting reduces household waste, cuts trash costs, and delivers free fertilizer for plants. It also lowers methane emissions from landfills by diverting organic matter.
Choosing a Compost System for Home Composting
Pick a compost system that fits your space and needs. Options include a simple pile, a tumbler, or a bin.
- Open pile: Cheap and flexible, best for yards with plenty of space.
- Bin or container: Neat and contained; reduces pests and looks tidy.
- Tumbler: Faster turning and composting but costlier.
Consider location: partial shade, level ground, and easy access to water help maintain the pile.
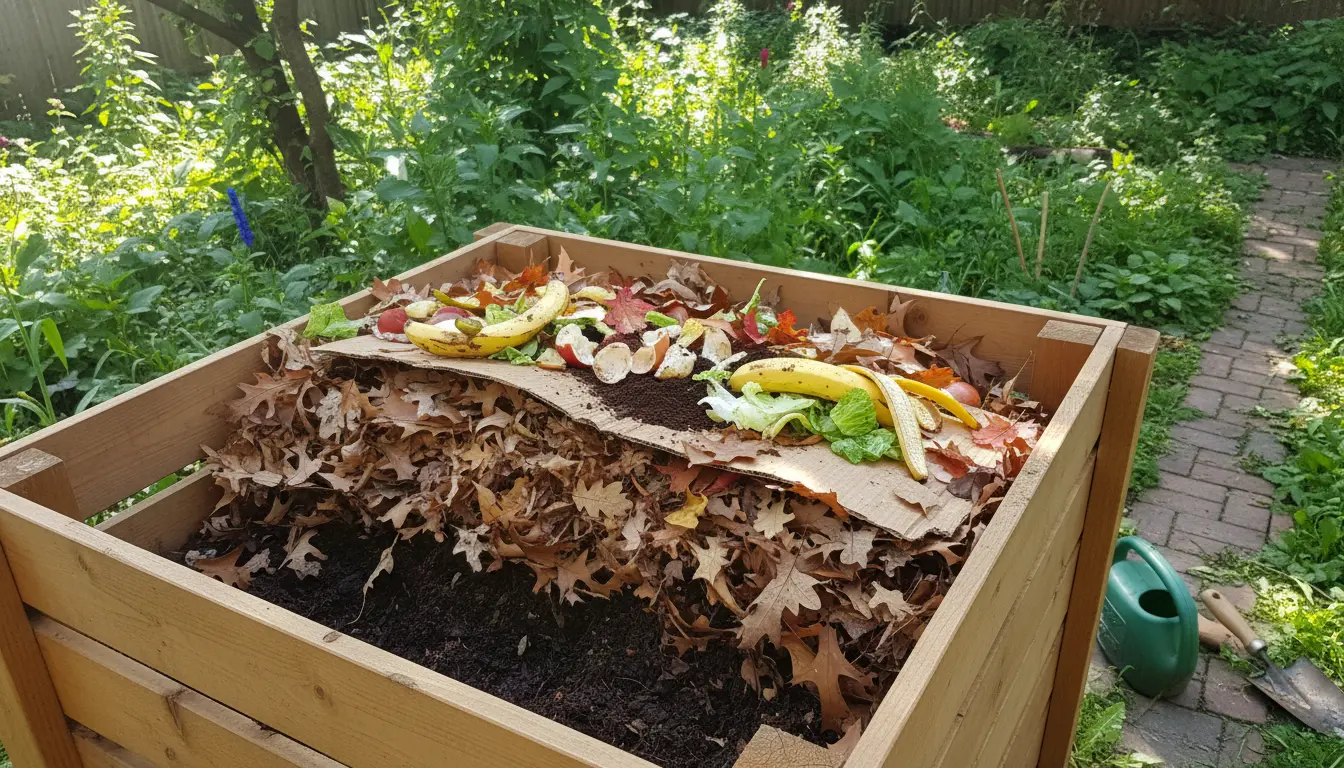
What to Compost and What to Avoid
Knowing what goes into your compost keeps the process efficient and odor-free. Balance ‘greens’ and ‘browns’ for best results.
Home composting: Greens vs Browns
- Greens (nitrogen-rich): Vegetable scraps, fruit peels, coffee grounds, fresh grass clippings.
- Browns (carbon-rich): Dry leaves, shredded paper, cardboard, straw, wood chips.
A good target ratio is about 2 parts browns to 1 part greens by volume. Too many greens cause odors; too many browns slow decomposition.
Items to Avoid in Home Composting
- Meat, bones, dairy, and greasy foods (attract pests).
- Diseased plants, invasive weeds, and treated wood (may survive or leach chemicals).
- Pet feces and human waste (pathogen risk).
How to Build and Maintain Your Compost
Follow these steps to establish an active and healthy compost pile.
- Layer a 4-6 inch base of coarse browns like twigs or straw for airflow.
- Add alternating layers: a layer of greens (2-3 inches) then browns (4-6 inches).
- Moisten each layer; the pile should be as damp as a wrung-out sponge.
- Turn or mix the pile every 1–2 weeks to add oxygen and speed decomposition.
Layering for Healthy Home Composting
Thin layers speed breakdown and reduce odors. Chop large pieces to increase surface area and decomposition rate.
Monitoring Moisture and Temperature
Use a compost thermometer or feel the pile. Active compost heats to 120–160°F (50–70°C). If it cools, turn it and add greens.
If too dry, add water and more greens. If too wet and smelly, add dry browns and mix to restore air pockets.
Troubleshooting Common Home Composting Problems
Most issues come from imbalance of air, moisture, or particle size. Here are quick fixes.
- Bad odors: Add dry browns and turn the pile to increase airflow.
- Pests: Bury food scraps under browns or use a closed bin.
- Slow breakdown: Chop materials smaller, increase green content, and maintain moisture.
Compost can retain up to 20 times more water than regular soil, reducing the need for frequent watering in gardens.
Small Real-World Case Study
Case: A two-person household in Austin started a 65-gallon tumbler. They collected kitchen scraps and weekly yard waste. Within four months they had 50 liters of dark, crumbly compost.
Steps they followed: shredded yard waste, kept a 2:1 browns-to-greens balance, turned the tumbler twice a week, and maintained sponge-level moisture. Their garden yield improved and household trash volume dropped by a third.
Getting Started Checklist for Home Composting
- Choose a bin type and location.
- Gather browns: dry leaves, shredded paper, cardboard.
- Collect greens: kitchen scraps, coffee grounds.
- Start layering and keep the pile moist but not soggy.
- Turn regularly and monitor temperature and smell.
Final Tips for Successful Home Composting
Be patient: composting is a biological process and can take weeks to months. Small, consistent actions lead to steady results.
Experiment with different mixes and turning schedules to find what works best for your climate and materials.
If you want more advanced methods, consider hot composting for faster results or vermicomposting with worms for indoor solutions.