
Why start composting at home
Composting at home reduces kitchen and yard waste while returning nutrients to soil. It lowers garbage volume and can save money on fertilizers and waste pickup fees.
For beginners, home composting is a manageable way to contribute to environmental health without large equipment or specialized knowledge.
Basic principles of composting at home
Composting transforms organic matter into stable, soil-like material through controlled decomposition. The three key ingredients are carbon (browns), nitrogen (greens), and oxygen.
Balance these elements and maintain moisture and airflow to keep the process active and odor-free.
Carbon and nitrogen
Carbon-rich materials include dry leaves, straw, and shredded cardboard. Carbon provides energy for microbes and keeps the pile airy.
Nitrogen-rich materials include vegetable scraps, fresh grass clippings, and coffee grounds. Nitrogen supports microbial growth and speeds decomposition.
Air, moisture, and temperature
Air prevents anaerobic smells and supports beneficial microbes. Turn the pile or use an aerated bin to maintain oxygen.
Moisture should feel like a wrung-out sponge. Temperature will rise as microbes become active; high heat speeds up breakdown but is not required for small home piles.
Choosing the right compost system
Pick a system that fits your space and level of activity. Common options include open piles, tumblers, and enclosed bins.
- Open pile: cheap and simple, best for yards with space.
- Tumbler: faster results and easier turning, good for small yards.
- Enclosed bin: tidy and pest-resistant, ideal for suburban settings.
Bins for apartments and small spaces
Vermicomposting uses worms to break down food waste and fits on a balcony or indoors. Small sealed composters with carbon filters can handle kitchen scraps in apartments.
Choose a system that matches how much organic waste you produce and how much maintenance you want to do.
Step-by-step: How to start composting at home
Starting is straightforward if you follow a few basic steps. Begin with location, materials, and a simple routine.
1. Pick a spot
Choose a level area with partial shade and good drainage. Place the bin within easy reach of your kitchen to encourage regular use.
2. Build a base
Start with a layer of coarse materials like twigs or straw to improve airflow. This foundation helps drainage and prevents compaction.
3. Add materials in layers
Alternate thin layers of greens and browns. Aim for roughly three parts carbon to one part nitrogen by volume for balanced decomposition.
4. Maintain the pile
Turn or mix the compost every 1–3 weeks to add oxygen. Check moisture and add water or dry material to maintain the wrung-out sponge feel.
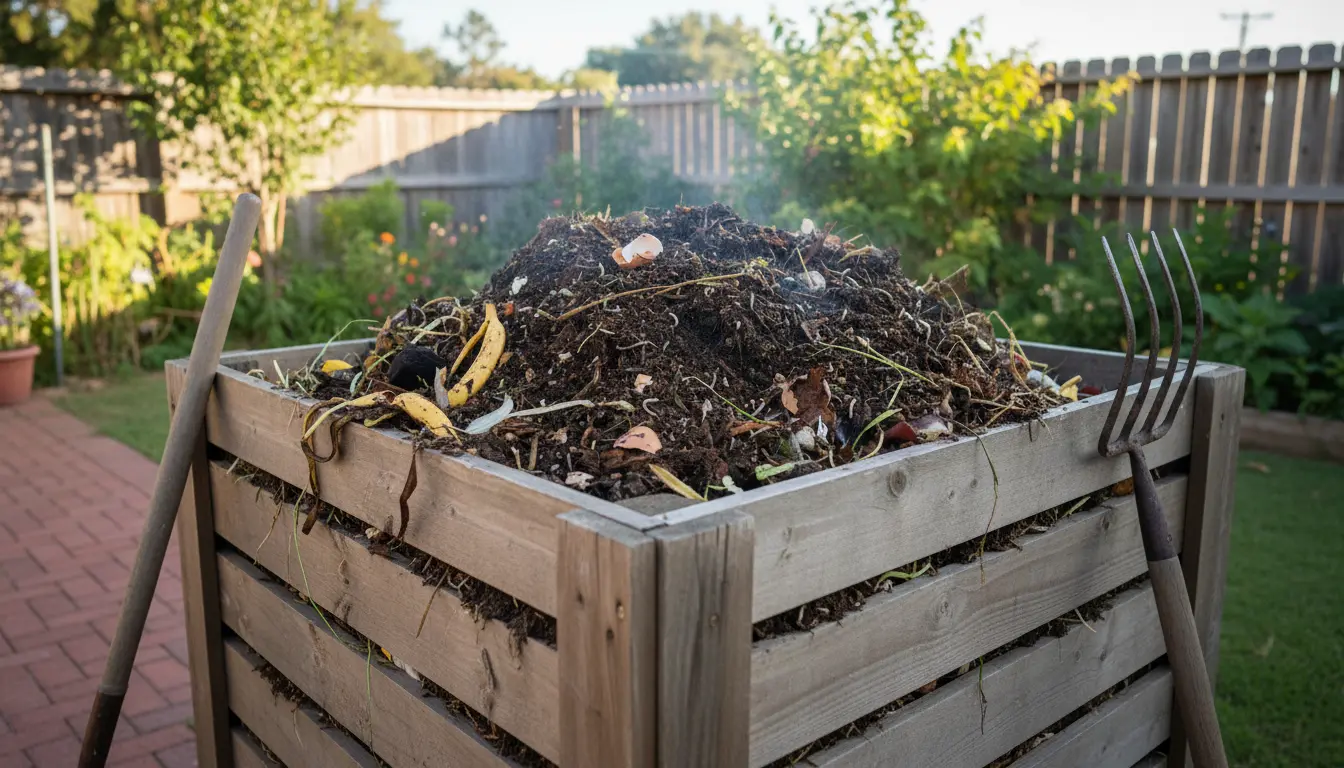
5. Harvest finished compost
Finished compost is dark, crumbly, and earthy-smelling. Use it in pots, mix it into garden beds, or top-dress lawns to improve soil health.
What to compost and what to avoid
Knowing what to add keeps the pile healthy and pest-free. Many common kitchen and yard wastes are suitable, while some items require caution.
Good items
- Fruit and vegetable scraps, coffee grounds, and tea bags
- Dry leaves, straw, shredded newspaper, and cardboard
- Grass clippings in small amounts and small plant trimmings
Items to avoid
- Meat, dairy, and oily foods (they attract pests and slow composting)
- Diseased plants or invasive weeds with seeds
- Pet waste from carnivores (risk of pathogens)
Composting 1 ton of organic waste prevents roughly 0.5 tons of CO2-equivalent methane emissions compared with sending that waste to landfill.
Troubleshooting common problems
Most compost problems have simple fixes. Odor, slow decomposition, and pests are the most common issues.
- Bad smell: Add more browns and turn the pile to increase aeration.
- Too dry: Add water and more greens to rehydrate the pile.
- Slow breakdown: Chop materials smaller and check the balance of greens and browns.
Short real-world case study
Case study: Emma, an apartment gardener in Portland, started vermicomposting in a 20-liter bin. She added daily kitchen scraps and shredded paper and harvested finished compost every 3 months.
After six months she produced about 30 liters of finished compost, reduced her trash by roughly 40%, and used the compost to boost potted herbs and vegetables.
Practical tips to keep going
Set a simple routine: empty a small kitchen container into your compost weekly. Keep a supply of shredded paper or dry leaves handy to balance greens.
Start small, learn by doing, and scale up as you become confident. Composting is flexible and adapts to many lifestyles.
Conclusion: Composting at home made simple
Composting at home requires few tools, modest time, and basic knowledge of greens, browns, air, and moisture. Follow the steps above and adapt methods to your space.
With regular attention you can turn household waste into valuable soil amendment while reducing landfill waste and improving your garden’s health.